

There’s something utterly delightful about the smell of freshly baked croissants wafting through the kitchen, isn’t there? As you master the art of mastering classic butter croissants, get ready to embark on a culinary journey that will fill your home with the warm, buttery aroma of flaky perfection. Imagine sinking your teeth into a golden-brown croissant with layers so light and airy, they practically float away. You’ll want to keep this recipe close to your heart, not just for its taste but for the sheer joy of creating something so indulgent at home.
If croissants have ever seemed like a distant dream, it’s time to roll up your sleeves and dive in! This step-by-step guide makes mastering classic butter croissants easier than you might think. Whether you’re planning a weekend brunch with friends or simply craving a little French flair, these croissants will steal the show. Your taste buds will thank you, and your friends? They may just treat you like a culinary wizard.
Why You'll Love This Mastering Classic Butter Croissants: A Step-by-Step Recipe Guide
- This incredible Mastering Classic Butter Croissants: A Step-by-Step Recipe Guide transforms simple everyday ingredients into restaurant-quality flavors that will blow your mind completely.
- Foolproof recipe techniques guarantee perfect results every single time, making even novice cooks feel like professional chefs instantly.
- Stunning visual appeal with gorgeous colors and mouthwatering aromas creates the ultimate Instagram-worthy dish for any special occasion.
- Endlessly adaptable for different dietary needs while working beautifully for meal prep, date nights, or entertaining large groups effortlessly.
Ingredients for Mastering Classic Butter Croissants: A Step-by-Step Recipe Guide
Here’s what you’ll need to make this delicious Mastering Classic Butter Croissants: A Step-by-Step Recipe Guide:
⅔ cup warm whole milk – This acts as the yeast’s best friend, helping it activate properly for that fluffy texture we adore.
4 tablespoons granulated sugar (divided) – A little sweetness enhances flavor and gives your croissants that pretty golden color.
½ cup cold water – This keeps the dough hydrated without making it too wet, achieving the ideal texture.
1 envelope active dry yeast (7g) – Always use fresh yeast! It’s the magical ingredient that gets the dough rising like your excitement when you think about the finished croissant.
4 cups all-purpose flour – You’ll need a high-quality flour for a tender yet structured dough that can hold all that buttery goodness.
2½ teaspoons salt – Essential for flavor, salt enhances all the natural ingredients, making your croissants irresistible.
¼ cup unsalted European-style butter (cubed and very soft) – It enriches your dough, contributing to that tender texture and rich flavor every bite deserves.
1¼ cups unsalted European-style butter (for the butter layer) – The star of the show, this butter needs to be just the right temperature to create those iconic layers.
1 large egg (for egg wash) – This gives your croissants their beautiful, glossy finish as they bake.
1 tablespoon heavy cream or whole milk (for egg wash) – Combined with the egg, this adds another layer of richness and color to the croissants.
How to Make Mastering Classic Butter Croissants: A Step-by-Step Recipe Guide
Follow these simple steps to prepare this delicious Mastering Classic Butter Croissants: A Step-by-Step Recipe Guide:
Step 1: Activate the Yeast
In a medium liquid measuring cup, combine the warm milk, yeast, and 1 tablespoon of sugar. Let it sit for 5 to 10 minutes until the yeast gets bubbly and happy. Add the cold water and stir gently.
Step 2: Combine Dry Ingredients
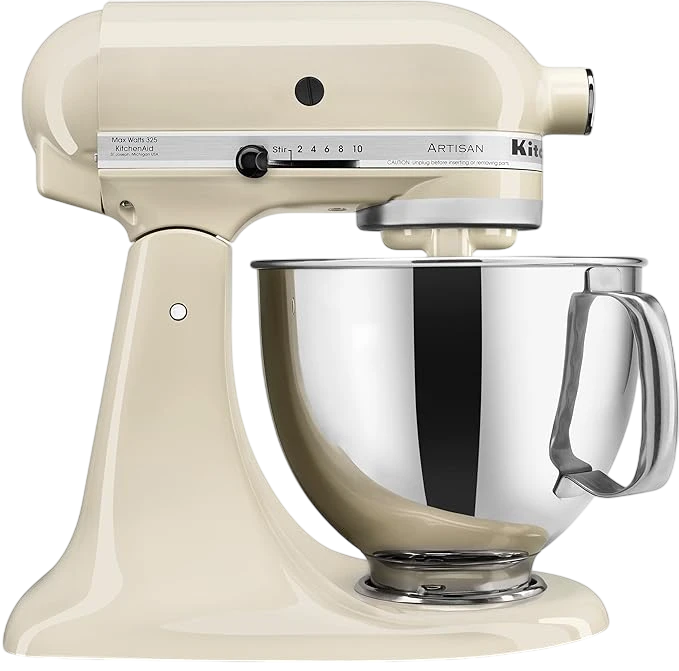
In the bowl of a stand mixer fitted with the dough hook, whisk together the flour, remaining sugar, and salt. Add the yeast mixture and very soft butter. Mix on low speed for 1 minute until the dough is shaggy yet combined. Don’t rush this step; you want it just right!
Step 3: Knead the Dough
Scrape down the sides of the bowl, and mix on low for 2 more minutes until the dough is soft but not sticky. Remove the dough from the bowl and shape it into a square about ½ inch thick. Wrap it tightly in plastic wrap and refrigerate for 30 minutes.
Step 4: Prepare the Butter Layer
Soften the butter for the layer at room temperature for about 15 minutes. Cut two sheets of parchment paper into 12-inch squares and shape the softened butter into a 10-inch square. Refrigerate the butter for about 10 minutes, keeping it cool but workable.
Step 5: Roll and Fold the Dough
Roll the chilled dough into a rectangle about 10×20 inches and ¼ inch thick. Place the butter in the center of the dough and fold the dough around it, sealing it in. Roll the dough into a 10×18 inch rectangle, then trim the edges. Perform a letter fold by folding the dough into thirds, cover with plastic wrap, and refrigerate for 30 minutes. Repeat this rolling and folding process three more times, refrigerating after each turn.
Step 6: Shape and Bake!
Wrap the dough tightly and refrigerate overnight or for up to 18 hours. The next day, roll the dough into a 12×28 inch rectangle. Cut triangles for the croissants by marking the dough in 4-inch increments. Shape each triangle by making a cut at the base, folding corners inward, and rolling the triangle up towards the tip. Place the shaped croissants on baking sheets, cover loosely, and let rise at room temperature for 2½ to 3 hours until doubled in size. Preheat the oven to 425°F. Whisk together the egg and heavy cream for an egg wash, then brush the tops of the croissants. Bake for 15 to 20 minutes at 375°F until golden brown. Let cool for about 10 minutes before serving.
Allow yourself to indulge in the joy of mastering classic butter croissants, watching your loved ones savor each bite filled with flaky goodness and buttery layers. With every delightful crunch, they will appreciate the love and labor you poured into these delicious pastries. Enjoy!

This showstopping Mastering Classic Butter Croissants: A Step-by-Step Recipe Guide delivers restaurant-quality results using simple ingredients you probably already have at home. The perfect balance of textures and flavors creates an unforgettable dining experience that will have everyone asking for seconds. Picture-perfect presentation with vibrant colors makes this dish absolutely Instagram-worthy and guaranteed to impress any dinner guest. Incredibly versatile recipe that works beautifully for weeknight dinners, meal prep, special occasions, or even outdoor entertaining sessions.
Perfecting Mastering Classic Butter Croissants: A Step-by-Step Recipe Guide Cooking Process
Begin your croissant journey by activating the yeast, then proceed with mixing the dough while ensuring your butter is at the right temperature. After the initial kneading, focus on rolling and folding the dough to create those signature layers.
Add Your Touch to Mastering Classic Butter Croissants: A Step-by-Step Recipe Guide
Feel free to enhance your croissants with a sprinkle of cinnamon or a dash of vanilla in the dough. You can also experiment with fillings like chocolate, almond paste, or even savory options like cheese and ham.
Storing & Reheating Mastering Classic Butter Croissants: A Step-by-Step Recipe Guide
Store your croissants in an airtight container at room temperature for up to two days. To reheat, simply pop them in the oven at 350°F for about 5-7 minutes for that freshly baked taste.
Chef's Helpful Tips for Mastering Classic Butter Croissants: A Step-by-Step Recipe Guide
- This professional-quality Mastering Classic Butter Croissants: A Step-by-Step Recipe Guide relies on precise timing and temperature control to achieve restaurant-standard results consistently.
- Master the art of mise en place by prepping all ingredients beforehand, ensuring smooth execution and preventing any last-minute cooking disasters.
- The secret lies in layering flavors throughout the cooking process rather than seasoning only at the end for maximum depth.
- Pro tip: let the finished dish rest for optimal texture and flavor development before serving to hungry guests waiting eagerly.
While I was perfecting my croissant technique, I remember serving a batch to my friends at a weekend brunch. Their delighted faces and compliments made me realize that there’s nothing quite like the joy of sharing delicious, homemade treats.
FAQs About Mastering Classic Butter Croissants: A Step-by-Step Recipe Guide
What is Mastering Classic Butter Croissants: A Step-by-Step Recipe Guide?
Mastering Classic Butter Croissants: A Step-by-Step Recipe Guide is your ultimate resource for creating flaky, buttery croissants right in your own kitchen. This recipe walks you through each stage, from activating yeast to shaping and baking the pastry, ensuring that even beginners can enjoy this delightful French treat. By following this guide, you’ll not only learn the science behind croissant-making but also enjoy the satisfaction of baking something truly remarkable.
Why are my croissants not rising?
If your croissants aren’t rising, the most likely culprit is the yeast. Ensure your yeast is fresh and you’ve activated it correctly by letting it foam in warm milk. The dough must also be kept at the right temperature during the rising phase. If it’s too cold, the yeast will be sluggish; if it’s too hot, you may kill it. Remember, patience is key in allowing your croissants to properly develop and rise.
Can I add fillings to my croissants?
Absolutely! You can customize your croissants with delicious fillings. For instance, chocolate chips, almond paste, or even savory options like ham and cheese can elevate your pastries to new heights. Just make sure not to overfill them; a little goes a long way to preserve the flaky layers and keep them from bursting during baking.
How should I store my croissants?
To keep your croissants fresh, store them in an airtight container at room temperature for up to two days. If you need to keep them longer, consider freezing them. When you’re ready to enjoy them, reheat in the oven at 350°F for about 5-7 minutes for that just-baked taste and crispy exterior. Proper storage will help maintain that beautiful texture that makes croissants so irresistible.
Conclusion for Mastering Classic Butter Croissants: A Step-by-Step Recipe Guide
In conclusion, Mastering Classic Butter Croissants: A Step-by-Step Recipe Guide empowers you to create bakery-quality croissants at home. Remember to activate your yeast, roll and fold the dough properly, and allow ample rising time to achieve those signature layers. With practice and patience, you’ll impress friends and family with your delicious homemade croissants that rival any French café. Enjoy the journey as you bake these delectable pastries!


Mastering Classic Butter Croissants: Easy Step-by-Step Guide
Ingredients
Equipment
Method
- In a medium liquid measuring cup, combine the warm milk, yeast, and 1 tablespoon of sugar. Let it stand for 5 to 10 minutes until the yeast creates foam. Add the cold water.
- In the bowl of a stand mixer fitted with the dough hook, whisk together the flour, remaining sugar, and salt. Add the yeast mixture and very soft butter. Mix on low speed for 1 minute until shaggy but combined.
- Scrape down the sides of the bowl and continue to mix on low for 2 more minutes. The dough should be soft but not sticky.
- Remove the dough from the bowl and shape it into a square about ½ inch thick. Wrap it tightly in plastic wrap and refrigerate for 30 minutes.
- Soften the butter for the layer slightly at room temperature for 15 minutes. Cut two sheets of parchment paper to 12-inch squares and shape the butter into a 10-inch square.
- Refrigerate the butter for about 10 minutes.
- Roll the chilled dough into a rectangle, around 10×20 inches and about ¼ inch thick.
- Place the butter in the center of the dough and fold the dough around the butter, sealing it in.
- Roll the dough into a 10×18 inch rectangle. Trim the edges and perform a letter fold by folding the dough into thirds.
- Cover with plastic wrap and refrigerate for 30 minutes. Repeat this rolling and folding process three more times, refrigerating after each turn.
- Wrap the dough tightly and refrigerate overnight or up to 18 hours.
- On the next day, roll the dough into a 12×28 inch rectangle. Cut the triangles for croissants by marking the dough in 4-inch increments.
- Shape each triangle by making a cut at the base, folding corners inward, and rolling the triangle up towards the tip.
- Place the shaped croissants on baking sheets, cover loosely, and let rise at room temperature for 2½ to 3 hours until doubled in size.
- Preheat the oven to 425°F. Whisk together the egg and heavy cream for an egg wash.
- Brush the tops of the croissants with the egg wash and bake for 15 to 20 minutes at 375°F until golden brown.
- Let cool on the baking sheets for about 10 minutes before serving.