
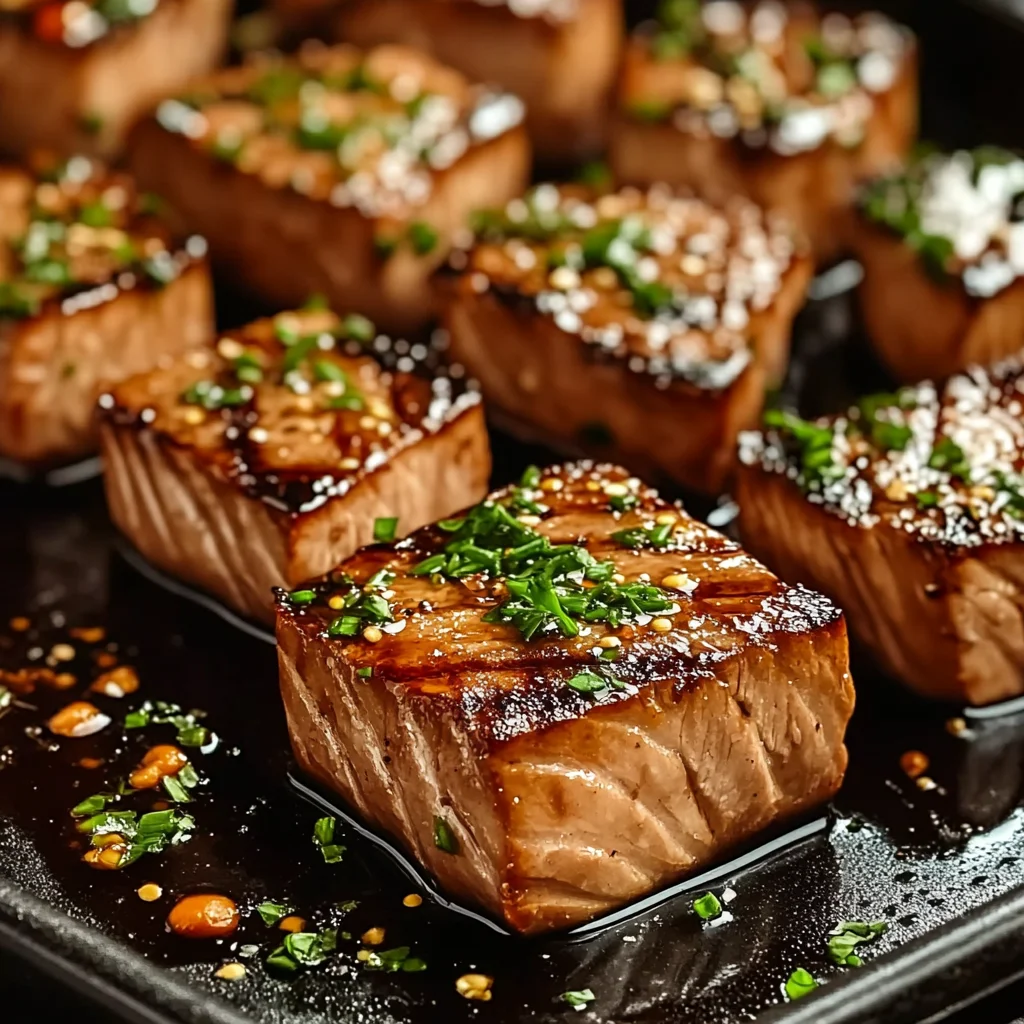
Imagine the sizzle of a perfectly seared tuna steak, its surface kissed by an aromatic marinade that dances with hints of citrus and soy, creating a symphony of flavors that awaken your taste buds. This tuna steak marinade is not just a recipe; it’s a celebration of fresh ingredients and culinary creativity, inviting you to embark on a delightful journey with every bite. I still remember the first time I tried this unforgettable dish at a summer barbecue, where laughter mingled with the tantalizing scent of grilled tuna wafting through the air. The juicy, tender steak paired beautifully with the zesty marinade, making it an ideal centerpiece for gatherings, special occasions, or simply those quiet evenings when you want to treat yourself. Get ready to dive into a world of flavor that promises to elevate your dining experience! Why Is tuna steak marinade So Irresistibly Good? Bold flavors from the soy sauce infuse your tuna steaks with umami goodness. Freshly squeezed lemon juice adds a zesty kick that brightens every bite. Minced garlic brings aromatic depth, while extra virgin olive oil ensures a luscious texture. Plus, a hint of honey balances the savory notes, making this marinade an absolute crowd-pleaser. Versatile and quick to prepare, it transforms simple tuna into a gourmet delight! tuna steak marinade Ingredients 1/4 cup soy sauce (low sodium preferred) – This savory base brings out the natural flavors of the tuna steak marinade. 2 tablespoons olive oil (extra virgin) – Adds richness and helps to keep the tuna moist during cooking. 2 tablespoons lemon juice (freshly squeezed) – Freshly squeezed juice brightens up the marinade with a zesty kick. 2 cloves garlic (minced) – Minced garlic infuses the marinade with aromatic depth and flavor. 1 teaspoon honey (optional for sweetness) – A touch of honey balances the saltiness for a well-rounded taste. 1 teaspoon black pepper (freshly ground) – Freshly ground pepper adds a warm, spicy note that enhances the overall flavor. 1 teaspoon dried oregano – This herb adds a hint of earthiness that complements the other ingredients beautifully. 1 teaspoon red pepper flakes (optional for heat) – Add red pepper flakes if you like a bit of spice to kick things up! Step-by-Step tuna steak marinade 1. Combine Ingredients: In a mixing bowl, combine 1/4 cup soy sauce (low sodium preferred), 2 tablespoons olive oil (extra virgin), 2 tablespoons freshly squeezed lemon juice, and 2 cloves of minced garlic. This blend will create a vibrant base for your marinade. 2. Whisk Together: Whisk the ingredients together until well blended. You’ll want a smooth mixture, ensuring that the flavors meld beautifully—about 30 seconds should do! 3. Prepare Tuna: Place the tuna steaks in a shallow dish or a resealable plastic bag. Make sure they’re laid flat to ensure even coating with the marinade. 4. Pour Marinade: Pour the marinade over the tuna, ensuring it is well coated. The rich flavors will infuse into the fish as it rests, enhancing its natural taste. 5. Refrigerate: Cover the dish or seal the bag and refrigerate for at least 30 minutes, up to 2 hours for more flavor. This allows all those delicious ingredients to work their magic! Optional: Garnish with fresh herbs before serving for an extra pop of flavor. Exact quantities are listed in the recipe card below. Pro Tips for tuna steak marinade Low Sodium Choice: Opt for low sodium soy sauce to control saltiness, allowing the fresh flavors of the tuna to shine through. Fresh Lemon Juice: Always use freshly squeezed lemon juice; bottled versions can lack the vibrant taste that enhances your tuna steak marinade. Minced Garlic: Ensure garlic is finely minced to release its full flavor. Larger pieces can result in uneven taste and overpowering bites. Honey Balance: If you choose to add honey, start with a small amount; it should complement, not overpower, the savory aspects of the marinade. Marinating Time: Avoid marinating for longer than 2 hours, as too much time can alter the texture of the tuna, making it mushy. Even Coating: Make sure all surfaces of the tuna steaks are well coated with the marinade; this ensures consistent flavor in every bite. How to Store and Freeze tuna steak marinade Fridge: Keep your tuna steak marinade in an airtight container for up to 5 days. This ensures freshness and retains its vibrant flavors. Freezer: You can freeze the marinade for up to 3 months in a freezer-safe bag. Be sure to label it with the date for easy reference! Thawing: When ready to use, thaw the frozen marinade overnight in the fridge or place the sealed bag in cold water for quick defrosting. Reusing: If you’ve marinated raw tuna, do not reuse the leftover marinade unless boiled first to eliminate bacteria. Enjoy your meals safely! tuna steak marinade Your Way Feel free to unleash your creativity and customize this marinade to match your taste buds! Citrus Zest: Add a teaspoon of orange or lime zest for a bright, fresh twist. The zest will elevate the marinade, adding a fragrant aroma that dances in the air as it mingles with the tuna. Herb Infusion: Substitute oregano with fresh herbs like basil or thyme for a vibrant flavor profile. Fresh herbs bring a garden-fresh essence that enhances each bite, making your dish even more inviting. Spicy Kick: Increase red pepper flakes or add chopped jalapeños for an extra kick. This variation will ignite your palate, transforming each mouthful into an exciting adventure of heat and flavor. Garlic Lovers: Double the minced garlic for an intense savory punch. Extra garlic infuses the tuna with deep flavors, creating a robust marinade that’s perfect for those who adore this aromatic ingredient. Maple Sweetness: Swap honey with maple syrup for a unique sweetness. The rich notes of maple provide an unexpected depth that harmonizes beautifully with the salty soy sauce. Sesame Flavor: Incorporate 1 tablespoon of sesame oil instead of olive oil for a nutty twist. This addition will lend a delightful
Easy Side Dishes: Broccoli Quinoa Salad and Garlic Bread Recipe
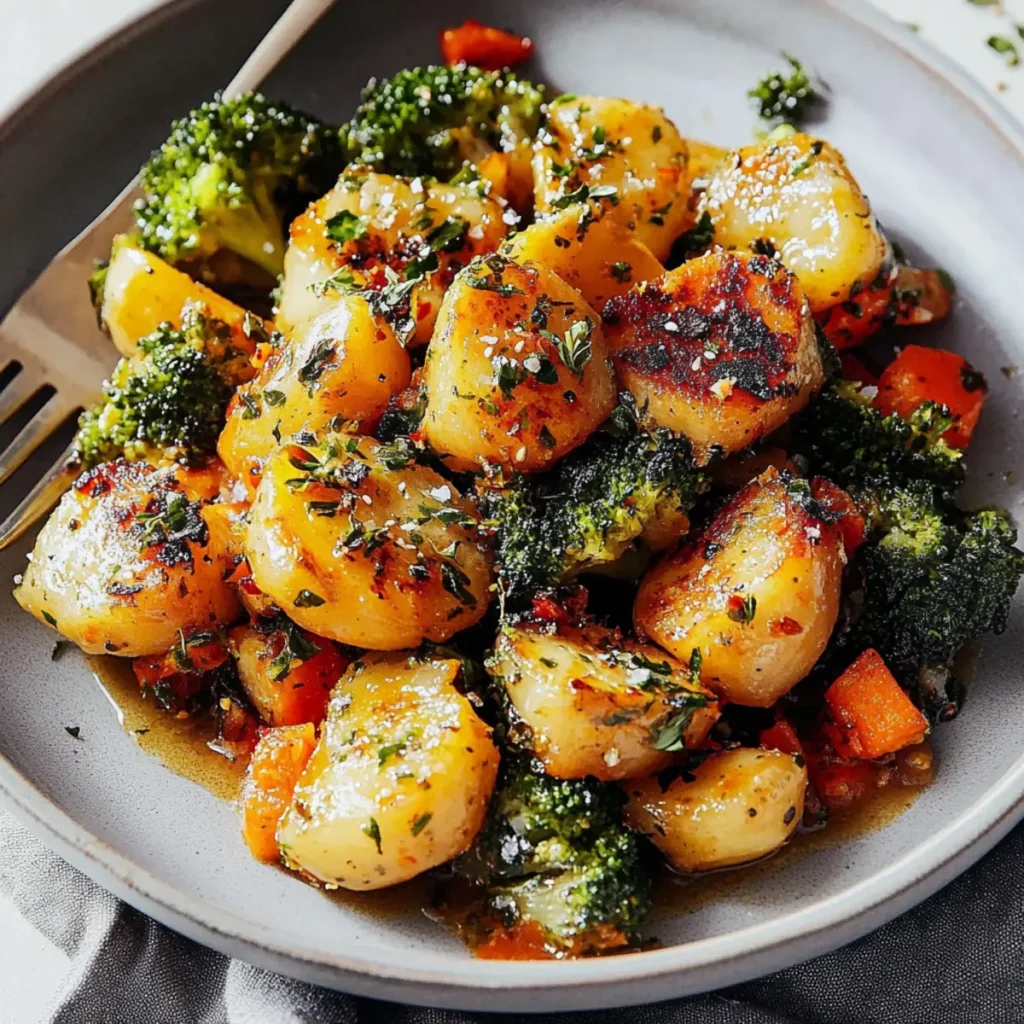
When you’re craving something light yet flavorful, this easy side dish—Broccoli Quinoa Salad with Garlic Bread—comes to the rescue! Imagine fresh, crunchy broccoli mingling with juicy cherry tomatoes and creamy feta cheese, all tossed together in a savory olive oil dressing. Meanwhile, warm garlic bread, crisp on the outside and soft within, sends aromas that pull you right into the kitchen with eager anticipation. This quick recipe won’t just brighten up your mealtime; it’ll have you daydreaming about it even before the first bite. Think back to those cozy family dinners where the table was filled with colorful dishes that made everyone excited to eat. Who doesn’t want to recreate that magic? This dish is not just easy to whip up in about thirty minutes; it’s the perfect accompaniment to any gathering or an everyday dinner. Trust me, your taste buds will thank you! Ingredients for Easy Side Dishes Here’s what you’ll need to make this delicious Easy Side Dishes: 2 cups broccoli florets – fresh florets provide a crunchy texture; frozen can be used if fresh isn’t available. 1 cup cherry tomatoes – select firm, bright tomatoes for the best flavor; slice them in half for sweetness. 1 tablespoon olive oil – a healthy fat source that adds richness to your salad. 1 teaspoon garlic powder – ensures a consistent garlic flavor; real minced garlic works just as well! 1/2 teaspoon salt – enhances all the flavors in your dish; adjust according to taste. 1 cup quinoa – a nutritious base for the salad; quinoa is gluten-free and full of protein. 2 cups water or vegetable broth – opt for broth to infuse the quinoa with extra flavor. 1/2 cup cucumber – adds a refreshing crunch; choose English cucumbers for fewer seeds. 1/4 cup red onion – gives a kick of flavor; soak it in water for a milder taste if desired. 1/4 cup feta cheese – adds a creamy, tangy touch to the salad; goat cheese is a great substitute. 1 loaf French bread – perfect for making irresistible garlic bread; crusty bread lends the best texture. 4 tablespoons butter – use unsalted to control the saltiness in your dish. 3 cloves garlic – fresh minced garlic creates that heavenly aroma. 1 tablespoon parsley – brightens and garnishes the final dish; feel free to swap in other herbs like basil. How to Make Easy Side Dishes Follow these simple steps to prepare this delicious Easy Side Dishes: Step 1: Cook the Quinoa Start by rinsing 1 cup of quinoa under cold water to remove any bitterness. Combine with 2 cups of vegetable broth or water in a pot. Bring to a boil, then lower the heat and let it simmer for about 15 minutes until the liquid is absorbed. Once cooked, fluff with a fork and let it cool. Step 2: Prepare the Vegetables While the quinoa cooks, chop 2 cups of broccoli florets, 1/2 cup of cucumber, 1 cup of cherry tomatoes, and 1/4 cup of red onion. Place all the chopped veggies in a large mixing bowl. Don’t forget to crumble the 1/4 cup of feta cheese into the mix; this will whip up the flavors just right. Step 3: Make the Dressing In a separate bowl, whisk together 1 tablespoon of olive oil, 1 teaspoon of garlic powder, and 1/2 teaspoon of salt. This mixture is going to coat those veggies beautifully, so drizzle it over the fresh salad. Give it a good toss to ensure every piece is flavorful. Step 4: Prepare the Garlic Bread While the salad rests, let’s focus on that garlic bread. Preheat your oven to 375°F (190°C). In a small bowl, combine 4 tablespoons of softened butter and 3 minced garlic cloves. Spread this gooey, fragrant mixture generously on a loaf of French bread. Step 5: Bake the Garlic Bread Place the buttered bread on a baking sheet and bake in the preheated oven for about 10 minutes or until golden brown. Trust me; your kitchen will smell unbelievable! Step 6: Serve and Enjoy Once the garlic bread is perfectly crispy, plate your vibrant quinoa salad alongside. Garnish with freshly chopped parsley for that touch of color. Dig in, and relish the delightful combination of flavors! With each satisfying bite of this Broccoli Quinoa Salad paired with warm garlic bread, you’re not just enjoying a delicious side dish, but also creating memories that could be just as comforting as they are tasty. Bon appétit! Perfecting Easy Side Dishes Cooking Process Start by cooking the quinoa first, as it needs to absorb moisture. While the quinoa cooks, prepare your veggies and garlic bread. This approach allows everything to come together simultaneously, ensuring optimal flavor and freshness in every bite. Add Your Touch to Easy Side Dishes Feel free to swap in your favorite vegetables, like bell peppers or zucchini, for the salad. You can also experiment with different cheeses—goat cheese or even mozzarella can add a delightful twist. Seasonings can be adjusted based on your palate too. Storing & Reheating Easy Side Dishes Store your salad in an airtight container in the fridge for up to three days. Reheat the garlic bread in the oven for a few minutes to regain that crispy texture. Avoid microwaving as it can make the bread soggy. Cooking this salad always reminds me of a gathering I had last summer. Friends raved about the dish, and one even claimed it was a “salad with superpowers.” It made me realize how a simple side can turn a meal into a collective memory. FAQs About Easy Side Dishes What is Easy Side Dishes? Easy side dishes are simple, flavorful accompaniments that enhance main meals without overwhelming them. These dishes typically feature accessible ingredients and straightforward preparation methods, making them perfect for busy weeknights or casual gatherings. They can feature a variety of vegetables, grains, and even proteins, with flavors that complement different mains such as grilled meats, pasta, or vegetarian options. A classic example is the
Delicious Sweet Potato Slices with Feta and Honey Recipe
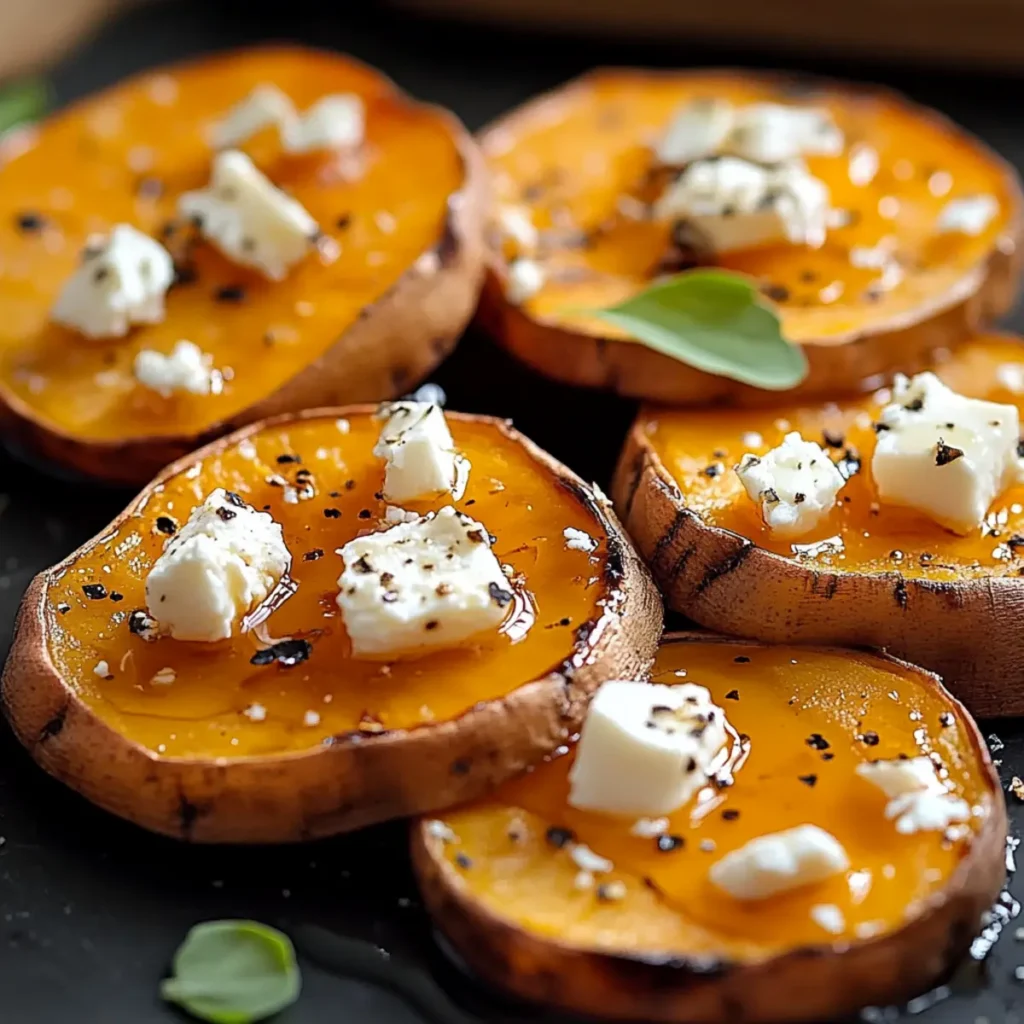
Imagine the aromatic symphony wafting through your kitchen as sweet potato slices roast to perfection. Sweet Potato Slices with Feta and Honey combine crispy edges with a melt-in-your-mouth interior, all topped with creamy feta and a luscious drizzle of honey. Each bite is an ode to autumn, where sweetness meets savory in a dance that’s sure to please your taste buds. This dish radiates warmth and comfort, perfect for cozy family dinners or casual gatherings with friends. The combination of sweet and salty will make your taste buds sing, while the vibrant colors will brighten up your dining table. Plus, it’s a breeze to prepare, making it the ideal recipe for both seasoned chefs and kitchen novices alike. Ingredients for Sweet Potato Slices with Feta and Honey Here’s what you’ll need to make this delicious Sweet Potato Slices with Feta and Honey: 4 medium sweet potatoes – Select firm, unblemished potatoes for the best flavor and texture. Peel and slice them to your desired thickness. 2 tablespoons olive oil – Extra virgin olive oil adds a rich flavor while helping to crisp the sweet potatoes. Salt to taste – A necessary ingredient to enhance all the natural flavors. Don’t be shy! Black pepper to taste – Freshly cracked black pepper gives a slight kick and complements the sweetness. 1 cup feta cheese – Crumble it fresh for the best texture and tang. It’s the perfect counterbalance to the sweet potatoes. 1/4 cup honey – Drizzle this liquid gold for a touch of sweetness and depth. Look for quality honey for the best results. 1 tablespoon fresh thyme or rosemary – Either herb brings a wonderful aroma and freshness to the dish. Use fresh for a noticeable impact. How to Make Sweet Potato Slices with Feta and Honey Follow these simple steps to prepare this delicious Sweet Potato Slices with Feta and Honey: Step 1: Preheat the Oven Begin by preheating your oven to 400°F (200°C). This high temperature ensures that the sweet potatoes roast beautifully, developing that irresistible caramelization. Step 2: Prepare the Sweet Potatoes Now, toss the sliced sweet potatoes in a large bowl with olive oil, salt, and black pepper. Make sure each slice is evenly coated; every bite should be full of flavor. Step 3: Arrange the Slices Spread the sweet potato slices out in a single layer on a baking sheet. Avoid overcrowding; this will allow them to get crispy rather than steaming. Step 4: Roast to Perfection Pop the tray into your preheated oven and roast the sweet potatoes for about 30 minutes. Halfway through, give them a stir to ensure even cooking. You’ll know they are ready when they are golden brown and tender. Step 5: Add the Finishing Touches Once cooked, remove the sweet potatoes from the oven and immediately sprinkle with crumbled feta cheese. The residual heat will soften the cheese just enough. Step 6: Drizzle and Garnish Finally, drizzle the honey over the top and sprinkle with fresh thyme or rosemary. The combination of sweet and savory is truly magical. Serve warm and prepare for a flavor revelation. Enjoy serving these Sweet Potato Slices with Feta and Honey on your favorite dish. Each bite is a celebration of flavors, textures, and aromas, ideal for fall gatherings or as a standout side at dinner. Bon appétit! Perfecting Sweet Potato Slices with Feta and Honey Cooking Process Begin by preheating the oven and preparing your ingredients. Toss the sweet potato slices in olive oil while the oven is warming up. This sequence ensures everything cooks evenly, allowing the flavors to meld beautifully as the sweet potatoes roast to perfection. Add Your Touch to Sweet Potato Slices with Feta and Honey Feel free to experiment by swapping feta cheese for goat cheese or adding spices like paprika for a hint of heat. You can even toss in nuts like walnuts or pecans for added crunch and nutrition that adds an extra layer of flavor. Storing & Reheating Sweet Potato Slices with Feta and Honey Store any leftovers in an airtight container in the fridge for up to three days. When reheating, gently warm them in the oven to restore their crispiness and flavor, making them taste as good as fresh. It was a chilly autumn evening when I first made these Sweet Potato Slices with Feta and Honey for friends. I was nervous, but their delighted reactions and repeated requests for the recipe turned my jitters into pure joy. FAQs About Sweet Potato Slices with Feta and Honey What is Sweet Potato Slices with Feta and Honey? Sweet Potato Slices with Feta and Honey is a delicious dish that combines the natural sweetness of roasted sweet potatoes with the tangy flavor of feta cheese and a drizzle of honey. This dish not only serves as a fantastic side but can also stand out as a light main course. The roasting brings out the sweet potato’s richness while the feta adds a creamy texture, and the honey balances it all with sweetness. It’s simple yet impressive, making it perfect for any gathering. How do you prepare Sweet Potato Slices with Feta and Honey? To prepare Sweet Potato Slices with Feta and Honey, start by preheating your oven to 400°F (200°C). Slice your sweet potatoes, toss them in olive oil, salt, and pepper, and spread them on a baking sheet in a single layer. Roast for about 30 minutes until they are tender and golden. When they’re ready, crumble feta cheese on top and drizzle honey over them. Garnish with fresh herbs like thyme or rosemary for added flavor. Can I customize Sweet Potato Slices with Feta and Honey? Yes, you can definitely customize Sweet Potato Slices with Feta and Honey! Feel free to swap the feta for goat cheese or add a kick with chili flakes or smoked paprika. You can incorporate nuts like walnuts or pecans for an added crunch. Experimenting with different herbs, such as oregano or basil, can also enhance the
Easy Homemade Corn Tortillas Recipe in Just 40 Minutes
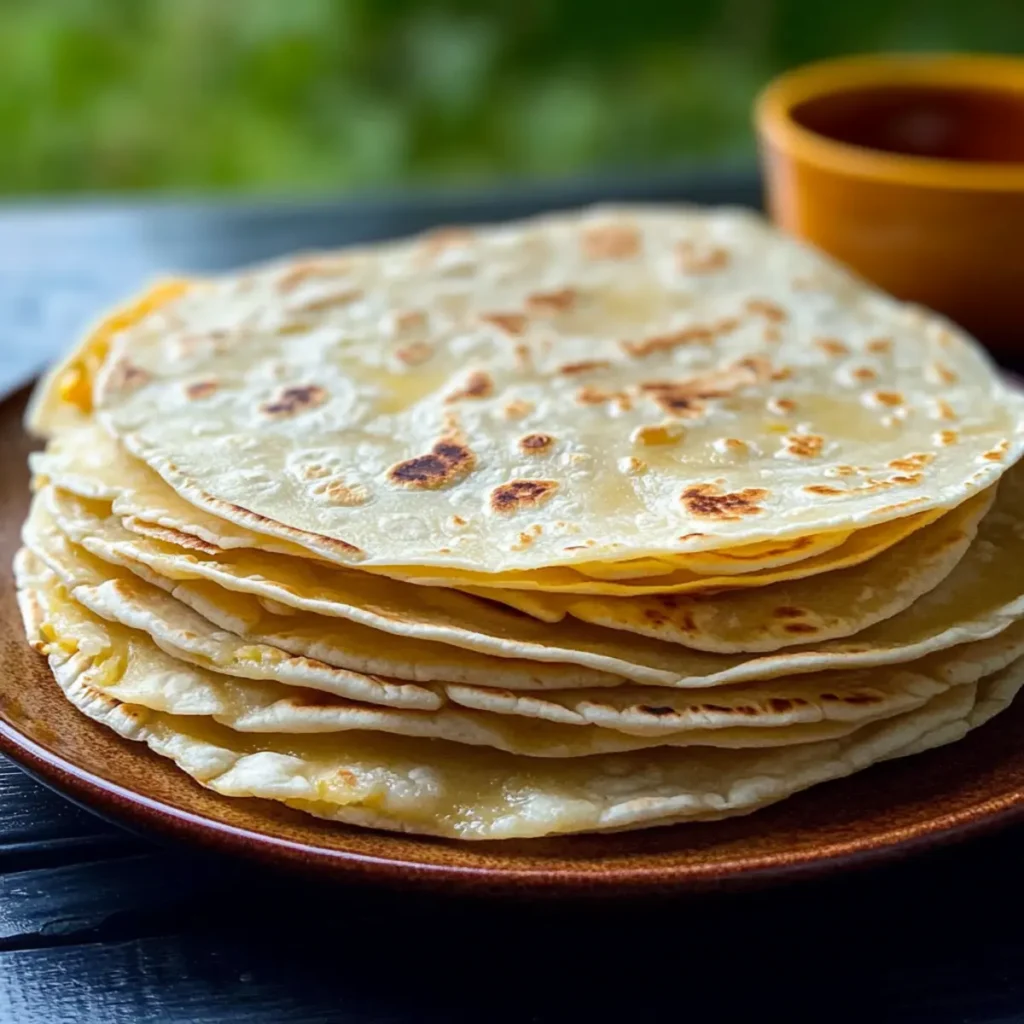
There’s nothing quite like the smell of freshly made Homemade Corn Tortillas wafting through your kitchen. Picture this: as the golden edges begin to crisp and the slightly sweet aroma fills the air, your mouth starts watering in anticipation. Whether slathered with butter or paired with your favorite filling, these tortillas are the canvas for countless delicious possibilities. I remember the first time I craved these homemade delights—my grandmother, with her well-worn hands, would whip up batch after batch on lazy Sundays. Those moments, surrounded by laughter and the delicious promise of warm tortillas, have forever etched a love for them in my heart. Now, you too can share in this joy, as each step of the process brings you closer to homemade heaven. Trust me; your family will be begging you to make these over and over again. Ingredients for Homemade Corn Tortillas Here’s what you’ll need to make this delicious Homemade Corn Tortillas: 150 g Masa Harina Flour – The heart and soul of your tortilla, this specially ground corn flour creates the perfect texture and flavor. ½ tsp Table Salt – Just a pinch to enhance the natural flavors of the masa harina and elevate your tortillas. 120 grams Warm Water – This vital component helps bring the masa harina together into a perfect dough. Use more if needed for the right consistency. How to Make Homemade Corn Tortillas Follow these simple steps to prepare this delicious Homemade Corn Tortillas: Step 1: Mix the Dry Ingredients In a mixing bowl, combine the masa harina flour and salt. Use a whisk to thoroughly mix them together, ensuring a uniform distribution of flavor. Step 2: Form the Dough Add the warm water into your flour mixture. Get your hands in there and mix until you have a rough dough. You’re looking for a consistency that is moist but not sticky. Step 3: Knead It Out Knead the dough in the bowl for about five minutes until it turns smooth and soft. Consider this your arm workout for the day—who needs a gym when you have tortillas to make? Step 4: Rest the Dough Cover the bowl with cling film or a clean tea towel, leaving it to rest for 20 minutes. This allows the dough to hydrate and makes rolling it out much easier. Step 5: Prepare Your Equipment While your dough is resting, cut squares of baking parchment slightly larger than your tortilla press. This little hack ensures that your tortillas won’t stick and will come out beautifully flat. Step 6: Shape and Cook Once rested, divide the dough into 10 pieces weighing about 35 grams each. Roll them into balls and place them on a baking tray covered with a damp towel. Got your frying pan heating on medium-high yet? You better! Now, place one piece of dough between two sheets of parchment in your tortilla press and flatten it out. Flip, press again for the ultimate thinness, and carefully peel it off. Now onto the sizzling action! Place your tortilla in the hot pan. Cook for 10 seconds; then flip it and let it toast for 1 minute on each side until lightly golden. Transfer it to a tortilla warmer or envelop it in a cozy tea towel to keep it warm. Repeat this delicious process until all your tortillas are cooked. Your homemade corn tortillas are ready and looking glorious! Transform them into tacos, enchiladas, or simply enjoy them with butter. Whatever you choose, get ready for taste sensations that are sure to make your taste buds dance with joy. Finally, gather everyone around the table, offer them a stack, and watch as they disappear faster than a burrito at a party. Enjoy every flavorful bite, knowing that you crafted this wonderful creation with your own two hands. Happy cooking! Perfecting Homemade Corn Tortillas Cooking Process Start by mixing your masa harina flour and salt to create a harmonious blend. Follow up with warm water, kneading until the dough is smooth. Rest it well while preheating your pan, and then press, cook, and keep warm for perfect results. Add Your Touch to Homemade Corn Tortillas Consider adding spices like cumin or chili powder to the dough for a flavor boost. You can also experiment with alternative flours like quinoa for a gluten-free version or throw in some fresh herbs for an aromatic twist. Storing & Reheating Homemade Corn Tortillas Store leftover tortillas in an airtight container in the refrigerator for up to a week. To reheat, briefly warm them in a skillet until soft, ensuring they don’t dry out. Sharing my first experience making Homemade Corn Tortillas was a game changer; my friends were convinced I’d picked them up from a local taqueria, and I basked in the glory of my newfound culinary skills. FAQs About Homemade Corn Tortillas What is Homemade Corn Tortillas? Homemade corn tortillas are a simple yet delightful staple in many kitchens. Made mainly from masa harina, a special corn flour, and water, they create a chewy texture that elevates any dish. Whether used in tacos, enchiladas, or simply enjoyed with a bit of butter, these tortillas pack a flavor punch unlike store-bought varieties. The beauty of making them at home lies in the freshness and the ability to customize them to your preference. How do I store Homemade Corn Tortillas? To store homemade corn tortillas, place them in an airtight container or wrap them tightly in plastic wrap. Keep them in the refrigerator, where they’ll stay fresh for up to a week. For longer storage, you can freeze tortillas, layered with parchment paper to prevent sticking. When you’re ready to enjoy them, simply reheat them in a skillet until warm and pliable. Can I make Homemade Corn Tortillas gluten-free? Absolutely! Homemade corn tortillas are inherently gluten-free since they are made with masa harina, which is derived from corn. This makes it a perfect alternative for those with gluten sensitivity or celiac disease. You can enjoy these delicious tortillas without
Delicious Healthy Strawberry Oatmeal Bars for Guilt-Free Snacking
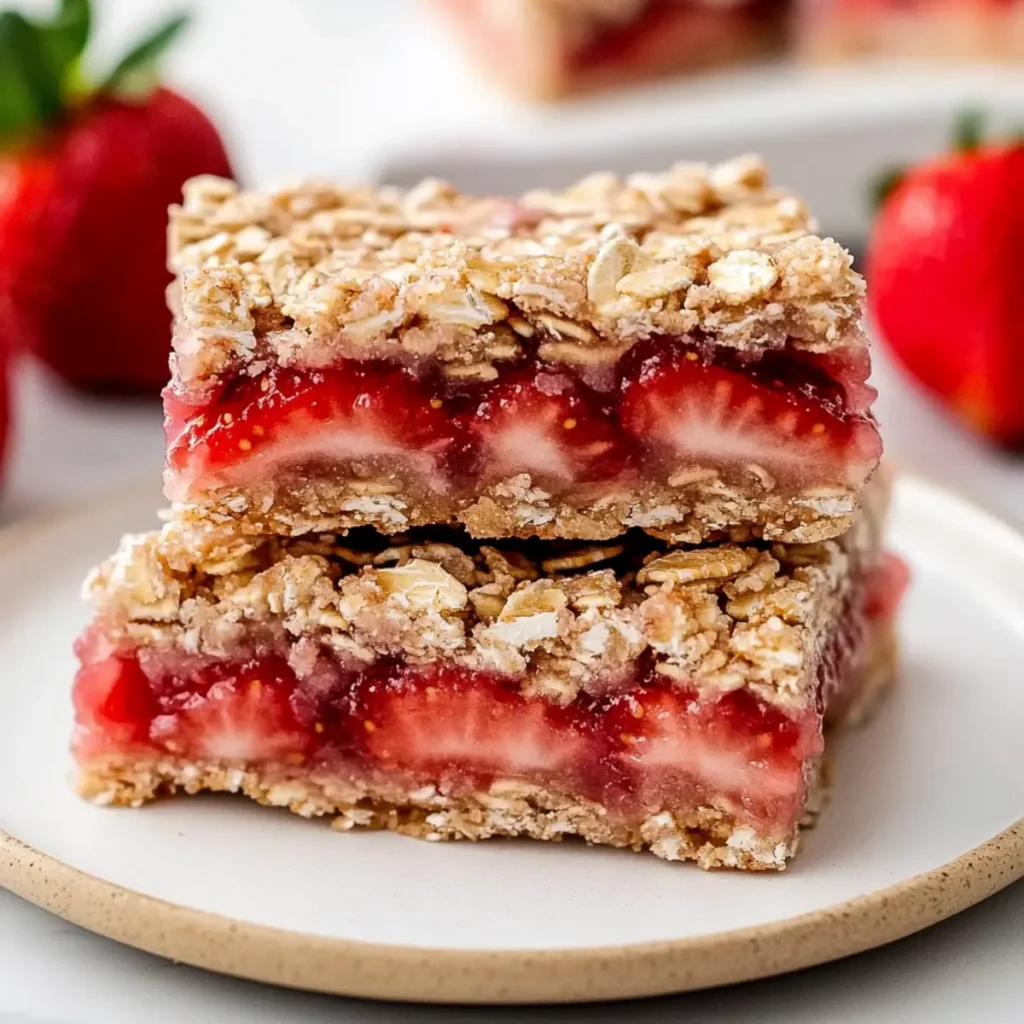
There’s something about the sweet and tart burst of strawberries nestled in an oatmeal blanket that makes my heart skip a beat. These delicious healthy strawberry oatmeal bars for guilt-free snacking are not just a treat for your taste buds, they’re a nostalgic hug wrapped in a cozy, crumbly topping. Picture yourself wandering into a sun-drenched kitchen filled with the aroma of baked goodness, the summer sun pouring in as you slice into these golden bars. Whenever I bake these bars, I’m transported back to summer picnics and lazy afternoons in the park. They’re not only perfect for a midday snack but also for family gatherings, potlucks, or anytime you need a pick-me-up. Plus, they’re a guilt-free indulgence that everyone can enjoy, no matter their snacking preferences. Trust me; once you take a bite, you’ll keep reaching for more! Ingredients for Delicious Healthy Strawberry Oatmeal Bars for Guilt-Free Snacking Here’s what you’ll need to make this delicious Delicious Healthy Strawberry Oatmeal Bars for Guilt-Free Snacking: 4 cups whole strawberries – Make sure they’re ripe and sweet for the best flavor; wash, hull, and dice them before using. ⅔ cup granulated sugar – This sweetness complements the strawberries, but you can adjust based on your preference. 1 ½ tablespoons lemon juice – Freshly squeezed juice adds brightness and balances the sweetness beautifully. ⅓ cup corn starch – This thickens the strawberry filling, giving it a nice structure. 2 cups old fashioned rolled oats – These give the bars a hearty texture and make them healthier. 2 cups all-purpose flour – This provides the base for the oat mixture and ensures a nice crumb. ⅔ cup granulated sugar – Essential for that delicious crumbly topping; feel free to substitute with brown sugar for a different flavor profile. 1 ½ teaspoons cinnamon – A warm spice that adds comfort and a lovely aroma. 14 tablespoons unsalted butter – Make sure it’s at room temperature for easy creaming. ½ teaspoon salt – Just a pinch enhances the overall flavor of the bars. 1 teaspoon pure vanilla extract – This adds a lovely, subtle sweetness that makes your mouth water in anticipation. How to Make Delicious Healthy Strawberry Oatmeal Bars for Guilt-Free Snacking Follow these simple steps to prepare this delicious Delicious Healthy Strawberry Oatmeal Bars for Guilt-Free Snacking: Step 1: Preheat the Oven Start by preheating your oven to 350°F (175°C). This is essential to ensure even baking and that glorious golden crust. Step 2: Mix the Strawberry Filling In a large mixing bowl, combine the diced strawberries, ⅔ cup granulated sugar, and lemon juice. Toss everything together gently and let it sit while you prepare the oat mixture, allowing the flavors to meld beautifully. Step 3: Combine the Dry Ingredients In another bowl, mix together the corn starch, rolled oats, all-purpose flour, cinnamon, and salt. This dry blend is the base of your oatmeal bars, providing both texture and flavor. Step 4: Cream the Butter and Vanilla In a separate bowl, cream the unsalted butter until it’s fluffy and light. Gradually stir in the vanilla extract, giving your bars that scrumptious touch. Step 5: Combine Wet and Dry Ingredients Slowly add the dry ingredient mixture to the creamed butter mixture, mixing until everything is just combined. You want it to be crumbly but moist. Step 6: Assemble and Bake Press half of the oat mixture evenly into a greased baking pan. Spread the strawberry mixture on top, then crumble the remaining oat mixture over the strawberries. Bake for 40 minutes or until the top is golden brown. Let it cool completely before cutting into bars. These delicious healthy strawberry oatmeal bars for guilt-free snacking are sure to become a staple in your home. Serve them warm with a scoop of vanilla ice cream or simply enjoy them as they are. You might just find yourself making them more often than you thought! This showstopping Delicious Healthy Strawberry Oatmeal Bars for Guilt-Free Snacking delivers restaurant-quality results using simple ingredients you probably already have at home. The perfect balance of textures and flavors creates an unforgettable dining experience that will have everyone asking for seconds. Picture-perfect presentation with vibrant colors makes this dish absolutely Instagram-worthy and guaranteed to impress any dinner guest. Incredibly versatile recipe that works beautifully for weeknight dinners, meal prep, special occasions, or even outdoor entertaining sessions. Perfecting Delicious Healthy Strawberry Oatmeal Bars for Guilt-Free Snacking Cooking Process Start by prepping your ingredients while the oven preheats, which saves time. Mix the strawberry filling and the dry ingredients separately, then blend them into the butter mixture for an efficient assembly. Finally, layer and bake to golden perfection. Add Your Touch to Delicious Healthy Strawberry Oatmeal Bars for Guilt-Free Snacking Feel free to swap in different fruits like raspberries or blueberries for a unique twist. Add nuts for crunch or dried fruits for additional sweetness, and play with spices like nutmeg or cardamom for a flavor upgrade. Storing & Reheating Delicious Healthy Strawberry Oatmeal Bars for Guilt-Free Snacking Store any leftover bars in an airtight container in the fridge for up to a week. To reheat, pop them in the microwave for 15-20 seconds or in the oven at 350°F until warmed through for a delightful snack. When my friend Amy tried these bars for the first time, she couldn’t stop raving about them. She said they were the perfect shareable treat for her book club, proving that guilt-free snacking can still impress. FAQs About Delicious Healthy Strawberry Oatmeal Bars for Guilt-Free Snacking What is Delicious Healthy Strawberry Oatmeal Bars for Guilt-Free Snacking? Delicious Healthy Strawberry Oatmeal Bars for Guilt-Free Snacking are a delightful and nutritious treat featuring layers of juicy strawberries and a crumbly oatmeal crust. These bars are made with simple ingredients like rolled oats, flour, and unsalted butter, offering a wholesome alternative to store-bought snacks. They’re perfect for breakfast, dessert, or a satisfying afternoon nibble. With their bright flavors and hearty texture, these bars are genuinely a guilt-free way
Crunchy Reuben Pickle Bites for Every Occasion: Easy Recipe

The moment you take a bite of these Crunchy Reuben Pickle Bites for Every Occasion, you’ll be greeted with an explosion of savory goodness that dances on your taste buds. Imagine crispy rye bread melting under the weight of pastrami, creamy Swiss cheese, and zesty pickles, all lovingly united with a tangy sauce that takes them to new heights. These irresistible bites are not only delicious; they bring a smile to anyone’s face, whether at a party, game day, or just a cozy night in. Flashback to one of those lovely afternoons when my friends and I gathered for a spontaneous brunch. Unbeknownst to them, my fridge was nearly empty, but I spotted some rye bread, pastrami, and pickles. And just like that, Crunchy Reuben Pickle Bites were born! Now, they’re a staple anytime I want to impress guests without sweating it in the kitchen. So, buckle up and let’s embark on this culinary adventure together! Ingredients for Crunchy Reuben Pickle Bites for Every Occasion Here’s what you’ll need to make this delicious Crunchy Reuben Pickle Bites for Every Occasion: 2.5 tablespoons mayonnaise – Acts as a creamy base for your sauce, giving a subtle richness. 1 tablespoon ketchup – Adds a touch of sweetness and tang to balance flavors; choose a good quality brand for best results. 1 teaspoon prepared horseradish – Gives a spicy kick that pairs beautifully with the savory elements. 0.5 teaspoon Worcestershire sauce – Brings depth and umami; a must-have in the flavor game. 0.25 teaspoon onion powder – Adds a mild onion flavor that complements all the other ingredients. 1-2 dashes hot sauce (such as Tabasco) – For those who enjoy a spicy punch; adjust according to your heat preference. 2 tablespoons butter – Used for frying, creating that golden-brown crunch we all love. 2 medium slices rye bread – Crusts trimmed, these add a unique flavor and complement the fillings perfectly. 6 small slices pastrami or corned beef (cut into thirds to make 18 strips) – Provides a savory, meaty foundation; the choice between pastrami or corned beef is yours! 2 slices Swiss cheese (cut into 18 (1-inch) pieces) – Melts beautifully and adds a creamy texture. 36 slices kosher dill pickle rounds – The star ingredient, their tanginess balances the richness of the meat and cheese. How to Make Crunchy Reuben Pickle Bites for Every Occasion Follow these simple steps to prepare this delicious Crunchy Reuben Pickle Bites for Every Occasion: Step 1: Prepare the Sauce In a bowl, mix together the mayonnaise, ketchup, horseradish, Worcestershire sauce, onion powder, and hot sauce until everything is well combined. This flavorful concoction is the heart and soul of your bites. Step 2: Assemble the Bites Lay out the rye bread pieces on a clean surface. Generously spread the sauce mixture evenly on each piece. Remember, every bite needs that delightful sauce! Step 3: Add the Toppings Next, on each rye slice, layer a strip of pastrami or corned beef, followed by a piece of Swiss cheese, and finish with a slice of kosher dill pickle. The layers will create a delicious combo of flavors. Step 4: Heat the Skillet Heat the butter in a skillet over medium heat. Once the butter is melted and bubbling, get ready to fry! Step 5: Fry the Bites Carefully place the assembled bites in the skillet. Fry them until they’re golden brown and crispy on both sides, about 2-3 minutes per side. You want them to be crunchy but not burnt, so keep an eye on them! Step 6: Serve and Enjoy Remove the bites from the skillet and place them on a paper towel to absorb any excess butter. Serve warm, ideally with extra sauce on the side for dipping. Trust me; your friends and family will go wild for these! Now picture this: a platter piled high with these Crunchy Reuben Pickle Bites, a cheeky grin on your face as you serve them up. No one can resist reaching for just one more. They’re not just snacks; they’re the life of the party! In this whirlwind of flavors and textures, the Crunchy Reuben Pickle Bites truly shine as a crowd-pleasing delight, perfect for every occasion. Whether at the game, a family gathering, or just a comforting night at home, they’re sure to bring everyone together – and that’s the beauty of food! This showstopping Crunchy Reuben Pickle Bites for Every Occasion delivers restaurant-quality results using simple ingredients you probably already have at home. The perfect balance of textures and flavors creates an unforgettable dining experience that will have everyone asking for seconds. Picture-perfect presentation with vibrant colors makes this dish absolutely Instagram-worthy and guaranteed to impress any dinner guest. Incredibly versatile recipe that works beautifully for weeknight dinners, meal prep, special occasions, or even outdoor entertaining sessions. Perfecting Crunchy Reuben Pickle Bites for Every Occasion Cooking Process Start by prepping your sauce so it’s ready to spread while you assemble the bites. Cook the bites in batches to prevent overcrowding the skillet and ensure that each piece gets that perfect golden brown crunch. Add Your Touch to Crunchy Reuben Pickle Bites for Every Occasion Feel free to swap out the pastrami for turkey or the Swiss cheese for cheddar to change things up. You could even throw in a sprinkle of dill for a fresh twist that takes these bites to the next level. Storing & Reheating Crunchy Reuben Pickle Bites for Every Occasion Store leftovers in an airtight container in the fridge for up to 3 days. To reheat, toss them in a skillet over medium heat until crispy again, or use an air fryer for that fresh-off-the-stove taste. Cooking these little bites brings a flood of memories to my mind, especially those nights when friends gathered around the table to devour them while sharing stories and laughter. It turned into more than just a meal; it became a celebration of good food and friendship. FAQs About Crunchy Reuben Pickle Bites for Every Occasion
Delicious Rustic No-Knead Rosemary Garlic Bread Recipe to Try
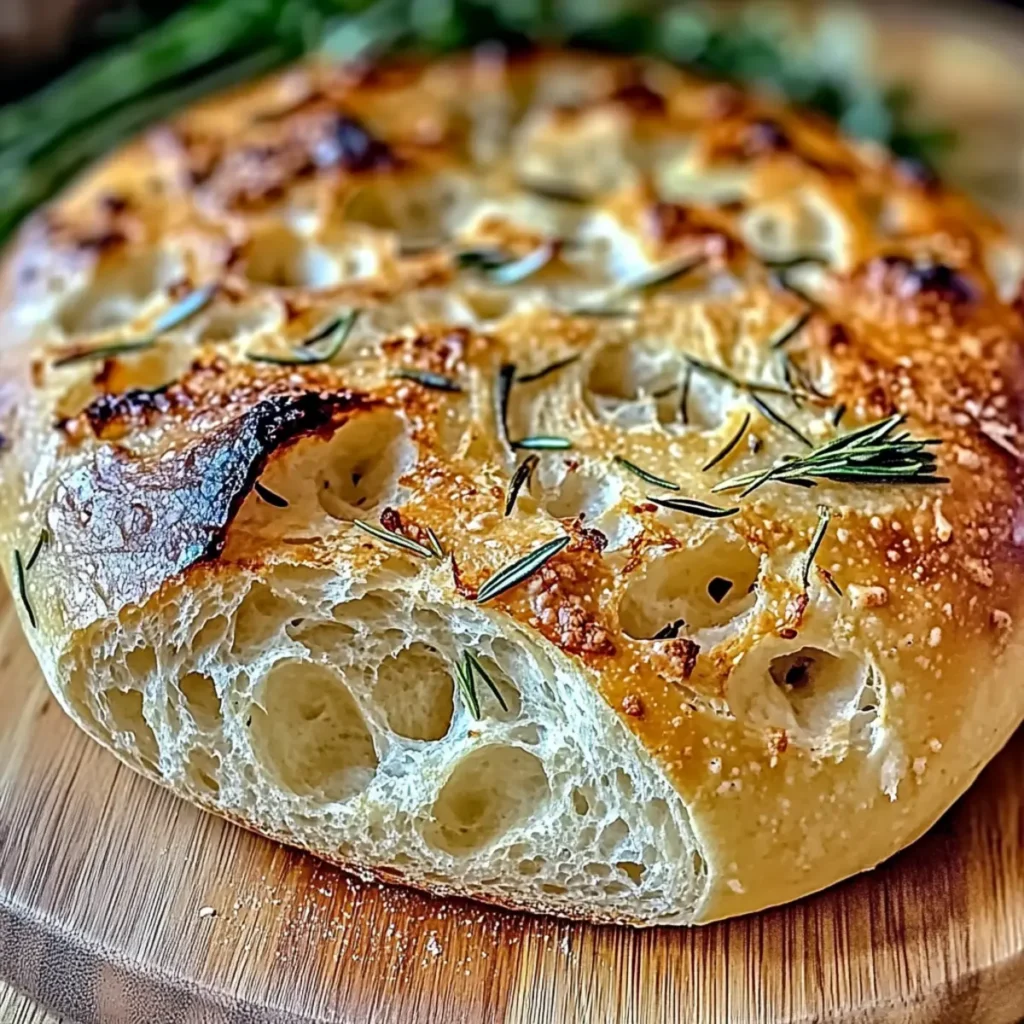
The aroma of fresh-baked bread wafting through your home can instantly transform even the dullest days into something special. Imagine pulling apart a golden crust, the rosemary and garlic mingling like old friends at a dinner party, while a warm, fluffy interior beckons you. This is exactly what you can expect from the Rustic No-Knead Rosemary Garlic Bread recipe, which is not only delicious but also incredibly easy to whip up. Memories flood back as I think about lazy Sunday afternoons spent in the kitchen, flour dust dancing in the sunbeams, and laughter echoing over the sound of crackling bread. Whether you’re hosting a cozy dinner or enjoying a quiet evening in, this scrumptious bread is the perfect accompaniment. Let’s dive into this delightful recipe that promises to bring everyone to the table. Ingredients for Rustic No-Knead Rosemary Garlic Bread Here’s what you’ll need to make this delicious Rustic No-Knead Rosemary Garlic Bread: 3 cups all-purpose flour – This classic staple provides a fluffy base; feel free to use whole wheat for a heartier texture. 1.5 teaspoons salt – Essential for flavor, this seasoning enhances the bread’s taste, allowing the rosemary and garlic to shine. 0.5 teaspoon instant yeast – This quick-acting ingredient helps the dough rise without a too-long waiting period. 1.5 cups warm water – Warm water activates the yeast; make sure it’s cozy at about 110°F (43°C) for optimal results. 2 tablespoons fresh rosemary, chopped – A fragrant herb that gives this bread its lovely aromatic profile; fresh is always best but dried can be used in a pinch. 4 cloves garlic, minced – Because who doesn’t love garlic? This flavor bomb adds a punch to each bite, creating a mouthwatering experience. How to Make Rustic No-Knead Rosemary Garlic Bread Follow these simple steps to prepare this delicious Rustic No-Knead Rosemary Garlic Bread: Step 1: Mix Dry Ingredients In a large bowl, combine the flour, salt, and instant yeast. The salt will help keep the yeast from over-activating; just give it a good whisk to mix everything together evenly. Step 2: Add Water and Flavor Pour in the warm water, then add the chopped rosemary and minced garlic. Using a wooden spoon or spatula, stir until a shaggy, somewhat sticky dough forms. Don’t worry too much about perfection here; that’s the beauty of no-knead bread! Step 3: Let It Rise Cover the bowl tightly with plastic wrap and let it rise at room temperature for 12 to 18 hours. Yes, you read that right! This long, slow rise is what gives the bread its delightful texture and depth of flavor. Step 4: Shape the Dough After the dough is beautifully puffed and full of bubbles, turn it out onto a floured surface. With floured hands, gently shape it into a ball, being careful not to deflate it too much. Step 5: Preheat and Prepare Preheat your oven to 450°F (232°C). While it heats, place a Dutch oven inside to pre-warm as well. This step is crucial for achieving that crusty exterior we love. Step 6: Bake the Bread Carefully transfer the dough to the hot Dutch oven and cover it with its lid. Bake for 30 minutes, then remove the lid and bake for an additional 15 minutes until it’s a beautiful golden brown. Your kitchen will smell heavenly! Now, remove the bread from the oven and let it cool on a wire rack before slicing. This step allows the interior to finish its cooking process without becoming soggy. Slice it up, and serve warm with a pat of butter or your favorite dip, and get ready for your taste buds to party! Baking Rustic No-Knead Rosemary Garlic Bread is not just about making bread; it’s about creating a cozy atmosphere and memorable moments. So, gather around the table with your family, relish each bite, and share some laughter. Enjoy! Perfecting Rustic No-Knead Rosemary Garlic Bread Cooking Process To create the ultimate Rustic No-Knead Rosemary Garlic Bread, start by mixing your dry ingredients first. Once combined, add the wet ingredients, ensuring the flavors meld beautifully. Let the dough rise while you prepare your other meal components or enjoy a cozy afternoon nap. Add Your Touch to Rustic No-Knead Rosemary Garlic Bread Feel free to personalize your Rustic No-Knead Rosemary Garlic Bread by adding cheese like Parmesan or mozzarella for a rich flavor. You can also experiment with different herbs such as thyme or oregano for a delightful twist. Storing & Reheating Rustic No-Knead Rosemary Garlic Bread Keep your Rustic No-Knead Rosemary Garlic Bread in an airtight container at room temperature for up to three days. For reheating, simply pop it in a preheated oven at 350°F (175°C) for a few minutes to regain that fresh-baked taste. Nothing warms the heart more than the first time I pulled this rustic bread out of the oven. Friends gathered around, their eyes widened as I sliced through the crust, revealing a soft, aromatic interior—one moment I’ll always cherish. FAQs About Rustic No-Knead Rosemary Garlic Bread What is Rustic No-Knead Rosemary Garlic Bread? Rustic No-Knead Rosemary Garlic Bread is a flavorful and aromatic bread that combines the earthy notes of fresh rosemary and the rich, savory flavor of garlic. This no-knead method allows for a beautiful rise without the labor of traditional kneading, resulting in a crusty exterior and soft interior. Perfect for casual family meals or elegant dinner gatherings, this bread not only adds a touch of sophistication but also fills your kitchen with an irresistible aroma. How long does it take to make Rustic No-Knead Rosemary Garlic Bread? While the hands-on prep time for Rustic No-Knead Rosemary Garlic Bread is only about 15 minutes, the magic happens during the long rise time, which can take anywhere from 12 to 18 hours. This slow process allows the flavors to develop beautifully. Once risen, the baking itself takes roughly 45 minutes. So, while you do need patience, the outcome is totally worth it! Can I customize my Rustic No-Knead Rosemary
Delicious Cheese Fondue for Two: Easy Romantic Recipe Guide
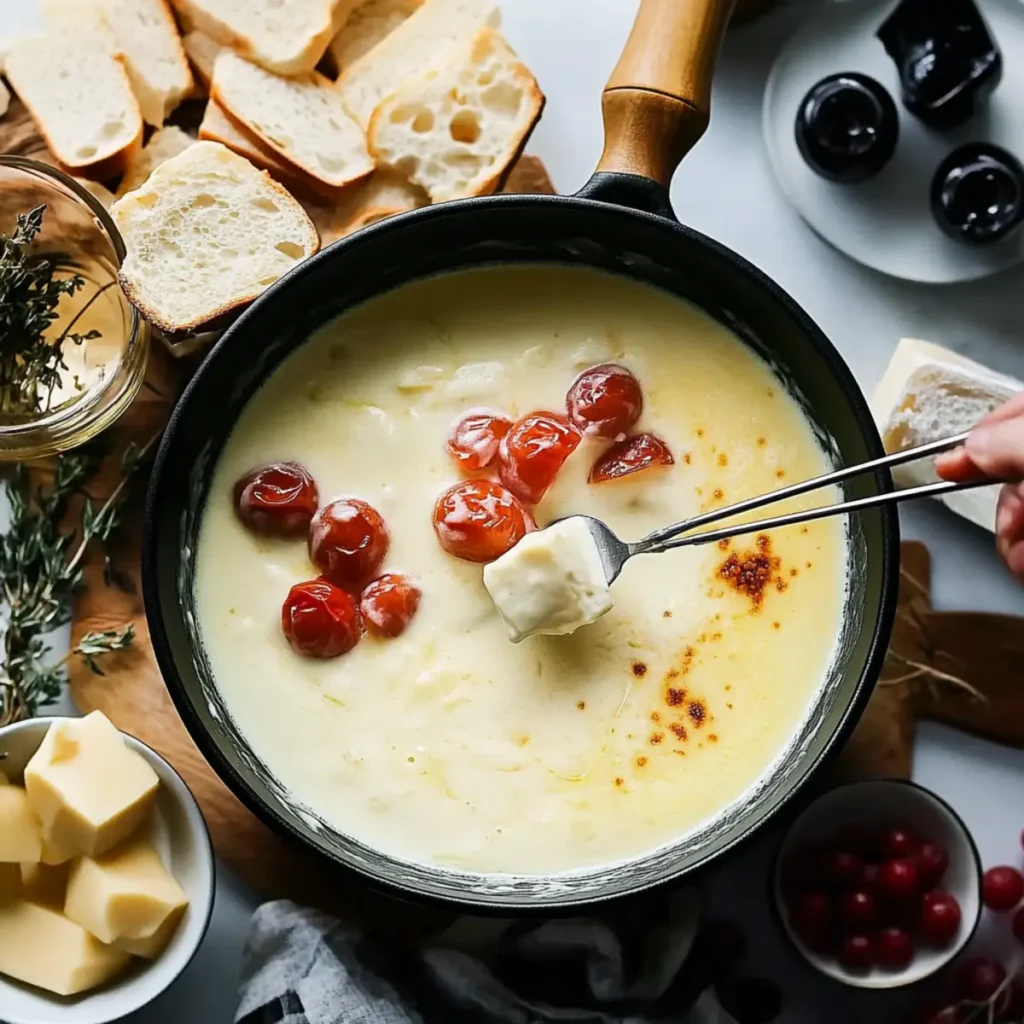
Indulging in a bubbling pot of Cheese Fondue for Two is like wrapping yourself in a warm, cheesy hug. The rich aromas of melted cheese combined with the hint of wine waft through the air, tantalizing your senses with a promise of gooey deliciousness. Picture yourself and your loved one dipping freshly baked bread, crisp vegetables, and savory sausage into that perfectly melted mixture, creating a symphony of flavors with every bite. It’s not just a meal; it’s a delightful experience waiting to unfold. Whether it’s a cozy night in or a romantic date, nothing spells intimacy like sharing a pot of fondue. This classic dish transforms ordinary moments into extraordinary memories, all while treating your taste buds to an explosion of flavor. So, grab your loved one, toast to cheese, and prepare for a delicious adventure that will elevate your dinner experience to gourmet heights. Ingredients for Cheese Fondue for Two Here’s what you’ll need to make this delicious Cheese Fondue for Two: 1 clove garlic – Slice it in half to impart a fragrant, flavorful essence to your fondue pot. 1.25 cups dry, unoaked white wine – This wine serves as the perfect base, adding a subtle acidity that enhances the cheese flavors. Be sure to choose a good quality wine because, as they say, the better the wine, the better the fondue. 1 tablespoon cornstarch – It helps emulsify the cheese and wine, ensuring a smooth and creamy consistency without clumping. 4 ounces gruyere cheese – Freshly grated, this nutty cheese is a classic fondue choice known for its melting qualities. 4 ounces gouda or edam cheese – These cheeses add a rich, creamy texture and depth of flavor that complements the gruyere perfectly. 4 ounces aged cheddar cheese – Freshly grated for the best results, this cheese adds a delightful tang and enhances the overall flavor profile. 0.5 teaspoon Dijon mustard – Adds a hint of spice and complexity, balancing the richness of the cheese. 0.5 lemon juice – About one tablespoon of freshly squeezed juice brightens the pot and adds a fresh note. 2-3 tablespoons olive oil – Enhances the fondue’s creaminess and richness while helping the ingredients blend beautifully. 10-12 pieces baby potatoes – These hearty little gems make for the perfect dippers, providing a satisfying bite with every dunk. 6 ounces broccoli or cauliflower florets – A colorful addition that brings crunch and freshness, making this fondue a bit healthier. 2 medium carrots – Peeled and diced into 1-inch cubes, they provide a sweet and crunchy contrast to the creamy cheese. 2 links fully-cooked chicken sausage – Sliced into bite-sized pieces, this adds a savory component that pairs beautifully with the cheese. 2 thick slices Italian bread – Cut into 1-inch cubes, this provides a classic way to enjoy fondue’s ooey-gooey goodness. 4 ounces bite-size salami – These flavorful morsels add a delightful touch that will impress your taste buds. kosher salt – Use to season your dish, elevating the flavors of every ingredient. ground black pepper – A sprinkle of this adds warmth and a bit of spice to round out your fondue. How to Make Cheese Fondue for Two Follow these simple steps to prepare this delicious Cheese Fondue for Two: Step 1: Prepare the Pot Begin by smearing the inside of your fondue pot with the cut sides of the garlic halves. This simple act sets the flavor base for your cheesy delight. Step 2: Mix the Cornstarch In a small bowl, stir together one cup of the dry, unoaked white wine and the cornstarch until it forms a smooth mixture. This will prevent your cheese from clumping together once it’s melted. Step 3: Heat the Wine In your fondue pot or saucepan, pour in the remaining wine and heat over medium heat until it gets hot but not boiling. Just before it starts bubbling up, we’re ready for the next step. Step 4: Add the Cheese Gradually add the freshly grated cheeses while stirring continuously. Don’t rush this step—slow and steady wins the fondue race. You want all that cheesy goodness to blend perfectly until it’s smooth and melted. Step 5: Thicken the Fondue Pour in the cornstarch mixture from earlier, followed by the Dijon mustard and lemon juice. Keep that cheese stirring until it thickens just the right amount—achieving a lovely, velvety texture is key. Step 6: Finish with Olive Oil Now, while continuing to stir, drizzle in the olive oil and season with kosher salt and ground black pepper to taste. Give it a final stir, and there you have a cheesy masterpiece ready for dipping. Now for the fun part—transform your fondue into a communal feast! Serve your melted cheese alongside the baby potatoes, broccoli or cauliflower florets, diced carrots, chicken sausage, Italian bread cubes, and bite-size salami. Invite your partner and dig in, experiencing the joy of fondue together. Enjoy this rich, gooey experience that’s bound to create lasting memories! Perfecting Cheese Fondue for Two Cooking Process To achieve the best results with your Cheese Fondue for Two, start by preparing your pot with garlic. Then, heat the wine while grating your cheeses, allowing for efficient melting and a creamy texture that’s dreamier than a romantic movie. Add Your Touch to Cheese Fondue for Two Feel free to switch up the cheeses based on your taste preferences or what you have on hand. Adding a sprinkle of fresh herbs or a dash of your favorite hot sauce can give your Cheese Fondue for Two an exciting twist! Storing & Reheating Cheese Fondue for Two Store any leftover Cheese Fondue for Two in an airtight container in the refrigerator for up to three days. To reheat, gently warm on low heat, stirring often, to retain that velvety texture without separating the cheese. Friends still talk about that time I served Cheese Fondue for Two during a chilly winter night, complete with cozy blankets and laughter. The warm, gooey cheese melted all the stress away and
Slow Cooker Maple & Brown Sugar Glazed Carrots Recipe for Easy Sides
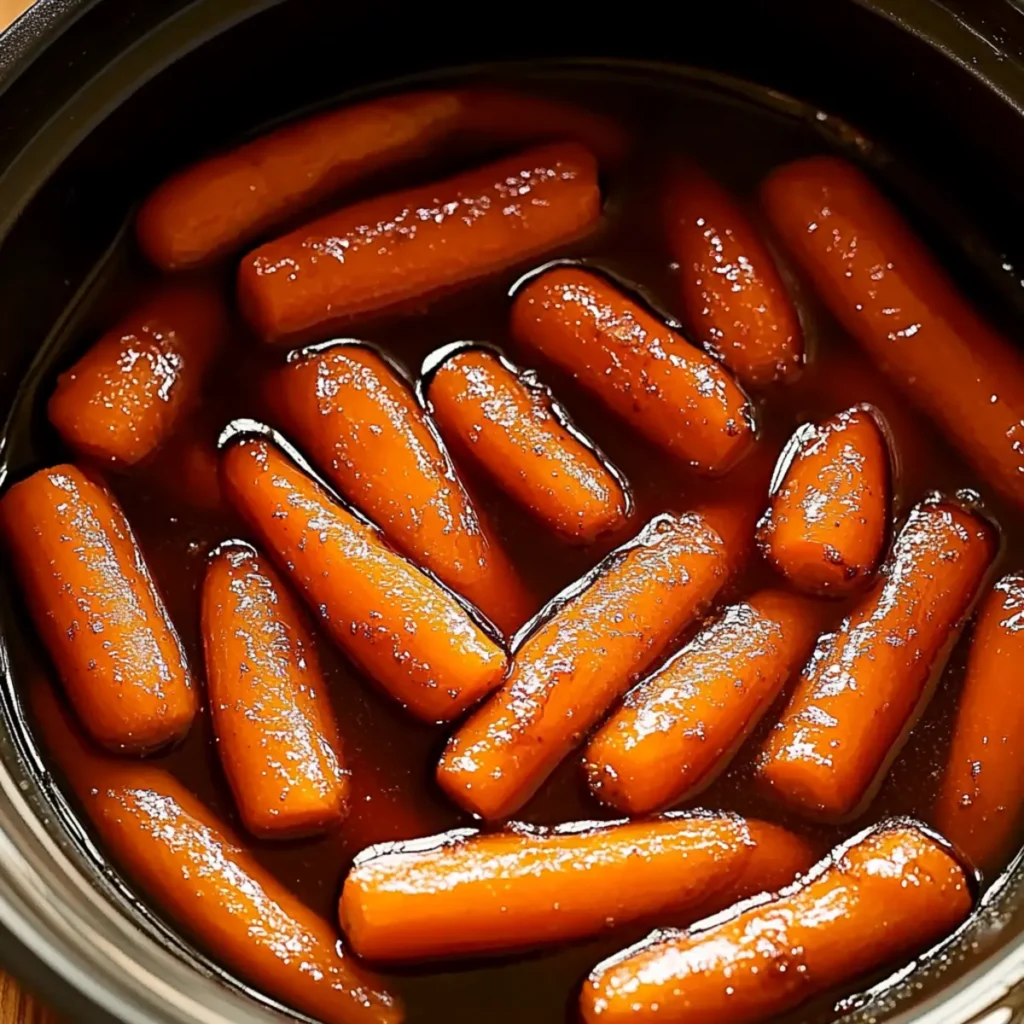
Indulging in a bowl of Slow Cooker Maple & Brown Sugar Glazed Carrots is like wrapping your taste buds in a cozy, sweet blanket on a chilly evening. The rich aroma of maple syrup melded with brown sugar and cinnamon wafts through your kitchen, enticing everyone to gather around the table. Picture perfectly tender baby carrots, glistening with a beautiful caramelized glaze that makes everyone want to dive in for seconds – or thirds! This recipe isn’t just a side dish; it’s the star of any meal. Whether it’s a holiday feast, a cozy family dinner, or simply an effort to brighten up your weeknight meals, these carrots will steal the show. And trust me, the flavor explosion is the kind that puts a warm smile on your face and a little dance in your step. Ingredients for Slow Cooker Maple & Brown Sugar Glazed Carrots Here’s what you’ll need to make this delicious Slow Cooker Maple & Brown Sugar Glazed Carrots: ⅓ cup Brown Sugar – Adds sweetness and a lovely caramelized flavor to the dish. Opt for packed brown sugar for the best results. ⅓ cup Real Maple Syrup – The star ingredient that brings a distinct and rich flavor; avoid imitation syrup for a more authentic taste. ½ teaspoon Cinnamon – Provides a warm, comforting hint of spice that complements the sweetness perfectly. ½ teaspoon Kosher Salt – Balances out the flavors and enhances the sweetness of the carrots. 2 pounds Baby Carrots – Tender baby carrots absorb the glaze beautifully. They’re easy to prepare and don’t require peeling. 4 tablespoons Unsalted Butter, sliced – Enriches the sauce and gives that irresistible buttery flavor to your carrots. How to Make Slow Cooker Maple & Brown Sugar Glazed Carrots Follow these simple steps to prepare this delicious Slow Cooker Maple & Brown Sugar Glazed Carrots: Step 1: Prepare Your Sweet Sauce Start by adding brown sugar, maple syrup, cinnamon, and kosher salt into your slow cooker. Whisk it together until everything is well combined, creating a syrupy goodness that even a bee would envy. Step 2: Coat the Carrots Toss those beautiful baby carrots into the sweet sauce. Gently stir them around to ensure every single carrot is coated in that incredible glaze, creating an instant visual masterpiece. Step 3: Introduce the Butter Take your sliced unsalted butter and lay it on top of the carrots. This will give your glazed carrots an extra layer of richness to tantalize your taste buds. Step 4: Cook to Perfection Cover your slow cooker and set it to high for 3-4 hours or low for 5-6 hours. You want those carrots to be tender but not mushy! During the last 45 minutes of cooking, remove the lid to allow some of that glorious sauce to reduce, thickening the glaze for even more flavor. Step 5: Final Touches Before Serving Once your carrots are perfectly cooked, give them a good stir to ensure that they’re all coated with that luscious sauce. If you want it thicker, mix in a cornstarch slurry for the glossy finish. Serve your Slow Cooker Maple & Brown Sugar Glazed Carrots hot and watch as your family digs in with delight. These Slow Cooker Maple & Brown Sugar Glazed Carrots are not only incredibly easy to prepare, but they also add color and a burst of flavor to your table. Enjoy them with roasted chicken, grilled steak, or as part of your holiday buffet. Each bite packs a punch of sweetness with a hint of warmth from the cinnamon, and you might just find yourself going back for more! So next time you’re staring into the fridge wondering what to make, remember just how quick and satisfying this dish can be. You’ll have everyone asking for your secret ingredient, and you can give them the age-old recipe: love, a little butter, and a pinch of maple magic. Grab your slow cooker and enjoy the sweet adventure! This showstopping Slow Cooker Maple & Brown Sugar Glazed Carrots delivers restaurant-quality results using simple ingredients you probably already have at home. The perfect balance of textures and flavors creates an unforgettable dining experience that will have everyone asking for seconds. Picture-perfect presentation with vibrant colors makes this dish absolutely Instagram-worthy and guaranteed to impress any dinner guest. Incredibly versatile recipe that works beautifully for weeknight dinners, meal prep, special occasions, or even outdoor entertaining sessions. Perfecting Slow Cooker Maple & Brown Sugar Glazed Carrots Cooking Process To achieve the best results with your Slow Cooker Maple & Brown Sugar Glazed Carrots, start by preparing the glaze first. Whisk together the brown sugar, maple syrup, cinnamon, and salt before adding the baby carrots. This order ensures every carrot gets a flavorful coating. Add Your Touch to Slow Cooker Maple & Brown Sugar Glazed Carrots Feel free to customize your Slow Cooker Maple & Brown Sugar Glazed Carrots! Swap the baby carrots for regular carrots cut into sticks, or add a splash of orange juice for a citrusy zest. You can even sprinkle some chopped nuts on top before serving for extra crunch. Storing & Reheating Slow Cooker Maple & Brown Sugar Glazed Carrots Store any leftovers of your Slow Cooker Maple & Brown Sugar Glazed Carrots in an airtight container in the refrigerator for up to three days. To reheat, simply place them in a saucepan over low heat with a splash of water, stirring gently until warmed through. Learning how to make Slow Cooker Maple & Brown Sugar Glazed Carrots brought back great memories. My friends couldn’t stop raving about this dish at my last dinner party, and now it’s become their go-to request whenever I host. FAQs About Slow Cooker Maple & Brown Sugar Glazed Carrots What is Slow Cooker Maple & Brown Sugar Glazed Carrots? Slow Cooker Maple & Brown Sugar Glazed Carrots is a delightful side dish that combines the natural sweetness of carrots with rich maple syrup and brown sugar. This dish is cooked in a
Easy Homemade Garlic Aioli Recipe in Just 10 Minutes
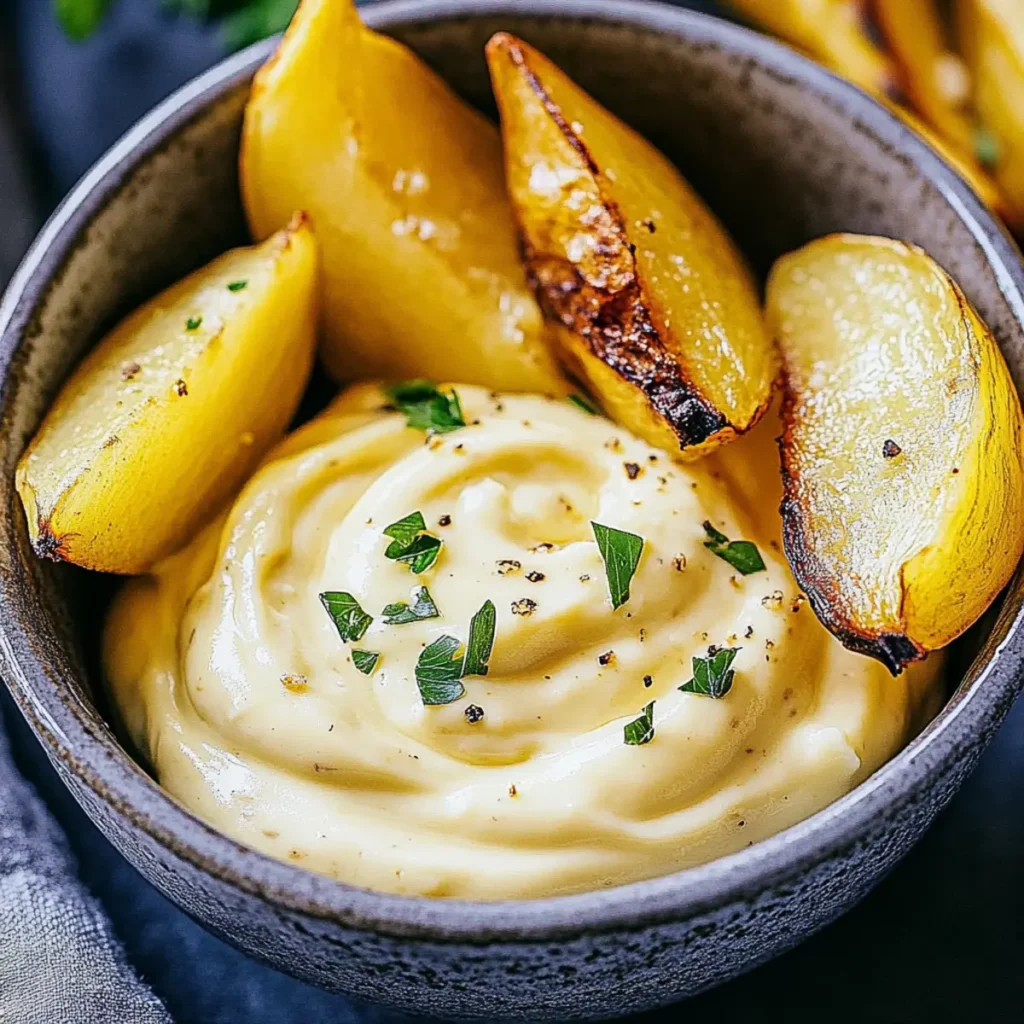
Imagine sitting at a quaint little café, where the smell of roasted garlic fills the air and a warm, creamy dip drizzles artfully over crispy fries. This epitome of flavor is just an easy homemade garlic aioli recipe in just 10 minutes away. With every mouthful, the rich, garlicky allure envelops your taste buds, and suddenly, all of your fast-food trips pale in comparison. Picture this: You, at home, whipping up this culinary delight in your own kitchen, impressing friends and family with your newfound cooking prowess. This easy homemade garlic aioli recipe in just 10 minutes isn’t just a way to elevate your meals; it’s also a chance to reminisce about family gatherings, where dips take center stage and chatter dances around the table. Get ready to discover how a handful of ingredients can transform your next dinner party into a masterclass of flavor! Ingredients for Easy Homemade Garlic Aioli Recipe in Just 10 Minutes Here’s what you’ll need to make this delicious Easy Homemade Garlic Aioli Recipe in Just 10 Minutes: 2 cloves garlic – Freshly peeled, these little bulbs are the stars of the show, providing that unmistakable flavor that we know and love. 1/4 teaspoon kosher salt – Not just for seasoning, this salt helps coax out the garlic’s inherent deliciousness while balancing flavors. 1/2 cup extra virgin olive oil – Use high-quality olive oil for a rich, fruity flavor that complements the garlic beautifully. 1 teaspoon fresh lemon juice – Just a touch of acidity brightens the aioli, cutting through the richness and elevating every dip. How to Make Easy Homemade Garlic Aioli Recipe in Just 10 Minutes Follow these simple steps to prepare this delicious Easy Homemade Garlic Aioli Recipe in Just 10 Minutes: Step 1: Prepare Your Workstation Wet a kitchen towel and wring it out until it’s just damp. Shape the towel into a ring on the counter and place a medium bowl in the center, creating a non-slip surface for whisking. Step 2: Grate the Garlic Finely grate the peeled garlic into the bowl. It should be a nice, fine paste. Add the kosher salt and an egg yolk to the bowl, whisking briefly to combine these flavorful components. Step 3: Emulsify the Mixture Begin whisking the egg yolk mixture vigorously. Start adding the olive oil a few drops at a time, continuing to whisk continuously. As the aioli starts to come together, you can gradually pour the oil in a steady, thin stream. Step 4: Finalize the Emulsion Once all the olive oil has been added, take a moment to whisk a few more times, ensuring everything is well combined and emulsified. Step 5: Add the Finishing Touches Whisk in the fresh lemon juice for that vibrant burst of flavor, and give it a taste. Adjust the salt if necessary for a perfect balance. Step 6: Serve with Style Transfer your luxurious garlic aioli to a serving bowl and enjoy it with everything from raw veggies to crispy potato fries or as a delightful sandwich spread. With this easy homemade garlic aioli recipe in just 10 minutes, you’ll be the star of your kitchen in no time. So, next time you feel like indulging in something deliciously garlicky, remember that a little whisking can lead to extraordinary things. Happy dipping! Perfecting Easy Homemade Garlic Aioli Recipe in Just 10 Minutes Cooking Process Start by preparing your tools and ingredients first. Grate your garlic and whisk your egg yolk before slowly adding olive oil while whisking continuously, ensuring a smooth emulsification that’s key to a rich, creamy aioli. Add Your Touch to Easy Homemade Garlic Aioli Recipe in Just 10 Minutes Consider infusing your aioli with flavors by adding herbs like basil or cilantro, trying a bit of Dijon mustard for a kick, or mixing in some paprika for a smoky touch. Storing & Reheating Easy Homemade Garlic Aioli Recipe in Just 10 Minutes Store any leftover aioli in an airtight container in the refrigerator for up to four days. Avoid reheating; instead, enjoy it cold or at room temperature to maintain its delicious texture. Sharing homemade aioli on a cozy Friday night really blew my friends away—it’s amazing how something so simple can add flair to any dish, making us all feel like gourmet chefs for an evening. FAQs About Easy Homemade Garlic Aioli Recipe in Just 10 Minutes What is Easy Homemade Garlic Aioli Recipe in Just 10 Minutes? The Easy Homemade Garlic Aioli Recipe in Just 10 Minutes transforms a few simple ingredients into a rich, creamy delight. This classic sauce, made with fresh garlic, egg yolk, olive oil, and lemon juice, can elevate any dish from ordinary to extraordinary. It’s versatile enough to use as a dip, spread, or dressing, making it a must-have for any home cook. Plus, with just a few minutes of effort, you can impress your friends and family with this restaurant-quality sauce made right at home. How do I customize the Easy Homemade Garlic Aioli Recipe in Just 10 Minutes? Customizing your Easy Homemade Garlic Aioli Recipe in Just 10 Minutes is a breeze! You can infuse different flavors by adding fresh herbs such as basil or cilantro. For a hint of tang, consider mixing in a bit of Dijon mustard. Feeling adventurous? A sprinkle of smoked paprika can add a delightful warmth to the aioli. Experimenting with these ingredients allows you to create a unique sauce that perfectly complements your favorite dishes. What dishes pair well with Easy Homemade Garlic Aioli? The Easy Homemade Garlic Aioli pairs wonderfully with a variety of dishes. It’s perfect as a dipping sauce for crispy french fries, roasted vegetables, or even fresh seafood. Use it as a spread on sandwiches or wraps to add a punch of flavor. You can also drizzle it over grilled meats or toss it with salads for an elevated touch. The options are endless, and your taste buds will certainly thank you! Can I store leftover Easy Homemade Garlic