
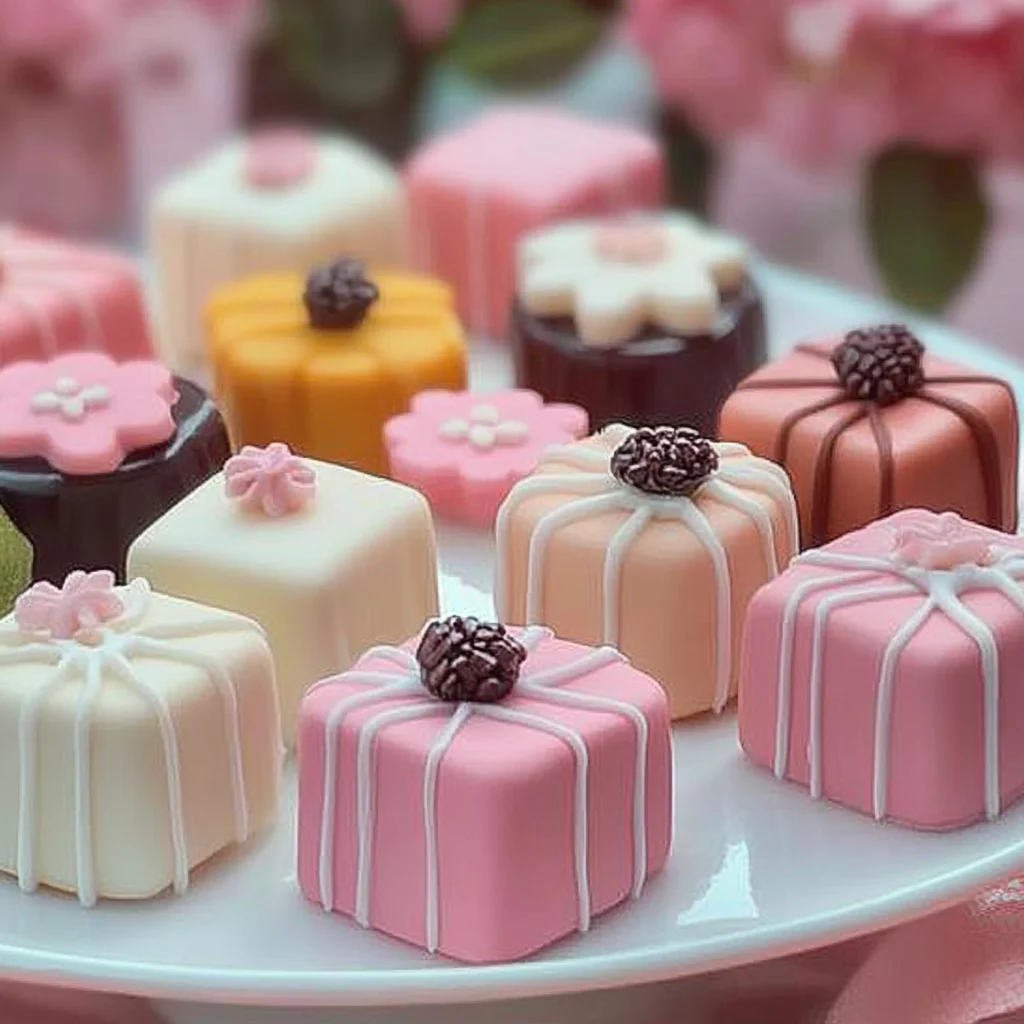
Imagine the first bite of a petit four, where a symphony of flavors dances on your palate—sweet, rich, and oh-so-decadent. These delicate, bite-sized cakes are not just desserts; they’re tiny masterpieces adorned with colorful icing that beckon you from the dessert table like little jewels waiting to be discovered.
I still remember the first time I indulged in a petit four at my grandmother’s tea party; it was an afternoon filled with laughter and the intoxicating aroma of freshly brewed tea. Whether it’s a festive celebration or a cozy gathering with friends, these charming treats elevate any occasion, promising an unforgettable burst of flavor that will leave you craving more.
Why Is petit fours So Irresistibly Good?
Delicate and charming, petit fours are the perfect bite-sized treats for any occasion. Versatile in flavor, you can customize them with your favorite jams or ganaches. Easy to make, this recipe requires just 30 minutes of prep time, making it a fantastic choice for both novice bakers and seasoned pros. Impressive in presentation, they’re sure to wow your guests and elevate your dessert table. Plus, who can resist their delightful icing adorned with a splash of color?
petit fours Ingredients
For the Cake
- 1 cup all-purpose flour – This forms the base for your delicate petit fours, providing structure and texture.
- 1 cup granulated sugar – Sweetens the cake perfectly, balancing flavors in every bite.
- 1/2 cup unsalted butter (softened) – Adds richness and moisture to your cake, making it tender.
- 2 large eggs – Essential for binding ingredients together and adding a lovely richness.
- 1 teaspoon vanilla extract – Infuses a warm, inviting flavor that enhances the sweetness.
- 1/2 cup milk – Keeps the batter moist and helps achieve the right consistency.
- 1 teaspoon baking powder – Provides leavening, ensuring your cakes rise beautifully.
For the Icing
- 2 cups powdered sugar – Creates a sweet glaze that beautifully coats your petit fours.
- 2 tablespoons milk – Adjusts the icing’s consistency to make it smooth and spreadable.
- 1 teaspoon vanilla extract – Enhances the flavor of the icing, complementing the cake beneath.
- Food coloring (optional) – Use to add a splash of color for decoration and personalization.
For the Filling
- 1/2 cup jam or ganache (your choice of flavor) – Delivers a burst of delicious flavor between layers, making each bite irresistible.
How to Make petit fours

1. Preheat the oven to 350°F (175°C). Grease and line a baking pan with parchment paper, ensuring an easy release for your delicate cake later on.
2. Cream together the softened butter and granulated sugar in a mixing bowl until light and fluffy. This process usually takes about 3-5 minutes, giving your cake a lovely texture.
3. Add the eggs one at a time, mixing well after each addition. Stir in the vanilla extract for that aromatic touch that makes every bite special.
4. Whisk together the flour, baking powder, and milk in a separate bowl until smooth. Gradually add this mixture to the butter blend, creating a rich batter full of promise.
5. Pour the batter into the prepared baking pan and smooth the top. Bake for 20 minutes or until a toothpick inserted comes out clean, indicating your cake is perfectly done.
6. Let the cake cool completely before removing it from the pan. Patience is key here; you want every layer to hold its shape when you’re ready to assemble.
Assemble the Petit Fours:
7. Cut the cooled cake into small squares or rectangles, perfect bite-sized pieces that will delight everyone at your table.
8. Spread a layer of jam or ganache between two pieces of cake to create a delightful sandwich. Choose your favorite flavor to add a personal touch!
9. Mix together the powdered sugar, milk, and vanilla extract in a bowl to create smooth icing. You can add food coloring if desired for a cheerful appearance!
10. Dip each cake sandwich into the icing, allowing excess icing to drip off before placing them on a wire rack to set—watch as they transform into beautiful treats!
11. Decorate with additional icing or edible decorations once the icing has set, making each petit four unique and irresistible.
Optional: Drizzle extra icing on top for an even sweeter finish!
Exact quantities are listed in the recipe card below.
Tips for the Best petit fours
- Proper Cooling: Allow the cake to cool completely before cutting; this prevents crumbling and ensures clean edges for your petit fours.
- Smooth Icing: Mix the icing until it’s smooth and glossy. If it’s too thick, add a splash more milk to achieve the right consistency for dipping.
- Layering Wisely: Use just enough jam or ganache between layers; too much can cause overflow when you sandwich them, creating a mess.
- Uniform Cutting: For even-sized petit fours, use a sharp knife or a ruler to measure and cut each piece precisely after cooling.
- Decorate Creatively: Don’t hesitate to get playful with colors and toppings! Edible glitter or sprinkles can add a charming touch to your elegant petit fours.
How to Store and Freeze petit fours
- Room Temperature: Keep your petit fours in an airtight container for up to 2 days to maintain their delicate texture and flavor.
- Fridge: For longer freshness, store them in the refrigerator for up to 5 days; ensure they are wrapped well to prevent drying out.
- Freezer: You can freeze petit fours for up to 3 months. Wrap each one individually in plastic wrap, then place them in a freezer-safe container.
- Reheating: If desired, allow frozen petit fours to thaw at room temperature for about 1 hour before serving; avoid microwaving as it may alter their texture.
petit fours Your Way
Feel free to unleash your creativity and personalize these delightful treats with delicious variations that suit your taste.
- Gluten-Free: Substitute all-purpose flour with a 1:1 gluten-free baking blend for a similar texture. This option allows everyone to enjoy these charming cakes without compromising flavor.
- Chocolate Lovers: Replace 1/4 cup of flour with unsweetened cocoa powder for a rich chocolate cake. The deeper flavor pairs beautifully with fruity fillings, creating an indulgent treat.
- Lemon Zest: Add 1 tablespoon of freshly grated lemon zest to the batter for a refreshing citrus twist. This bright flavor will elevate your petit fours, making them perfect for spring gatherings.
- Almond Extract: Swap vanilla extract for almond extract for a nutty aroma and taste. It adds an elegant touch that beautifully complements various icings and fillings.
- Berry Filling: Use fresh berry jam instead of traditional flavors to create a vibrant filling. The sweet tartness of berries will provide a lovely contrast to the sweet icing.
- Coconut Cream: Replace milk in the cake with coconut milk for a tropical flair. The subtle coconut flavor pairs wonderfully with vanilla icing, making each bite feel like a mini vacation.
- Spicy Kick: Add a pinch of cayenne pepper or cinnamon to the batter for an unexpected warmth. This twist brings depth and intrigue, perfect for adventurous palates.
- Nutty Crunch: Fold in finely chopped nuts like pistachios or hazelnuts into the batter for added texture. This variation introduces delightful crunchiness, enhancing each delicate bite.
Make Ahead Options

This petit fours recipe is perfect for meal prep, allowing you to enjoy these delicate treats without the last-minute rush. You can prepare the cake up to 24 hours in advance; simply follow the steps to cream together 1/2 cup of softened unsalted butter with 1 cup of granulated sugar, then add in your eggs and vanilla extract before mixing in the dry ingredients of 1 cup all-purpose flour, 1 teaspoon baking powder, and 1/2 cup milk. Once baked and cooled completely, cut the cake into small squares or rectangles and assemble them by spreading your choice of 1/2 cup jam or ganache between two pieces. You can also prepare the icing—a mixture of 2 cups powdered sugar, 2 tablespoons milk, and 1 teaspoon vanilla extract—up to 3 days ahead. Just remember to store everything in an airtight container to maintain freshness. When you’re ready to serve, dip each sandwich into the icing and let them set on a wire rack while you prepare for delightful presentations!
petit fours Recipe FAQs
What type of flour works best for making petit fours?
All-purpose flour is ideal for making petit fours as it provides the right balance of structure and tenderness. If you’re looking for a gluten-free alternative, you could try a 1: 1 gluten-free baking mix, but the texture may vary slightly.
How can I store leftover petit fours?
To keep your petit fours fresh, store them in an airtight container at room temperature for up to 3 days. If you want them to last longer, you can refrigerate them for up to a week. Just remember that refrigeration might slightly alter their texture.
Can I freeze petit fours?
Absolutely! To freeze your petit fours, place them in a single layer on a baking sheet until they are firm, then transfer them to an airtight container or freezer bag. They can be frozen for up to 3 months. Thaw them overnight in the refrigerator before serving to enjoy their delicate textures.
What should I do if my icing is too thick or too thin?
If your icing is too thick, simply add a teaspoon of milk at a time until it reaches your desired consistency. Conversely, if it’s too thin, gradually mix in more powdered sugar until you achieve that smooth, pourable texture that’s perfect for dipping your cakes.
How many servings does this recipe yield?
This recipe yields approximately 4 servings. Each petite cake packs about 150 calories, making them a delightful yet light treat perfect for gatherings or afternoon tea.
What flavors can I use for the filling?
The beauty of petit fours lies in their versatility! You can use any flavor jam or ganache that tickles your taste buds—think raspberry jam for a sweet-tart experience or rich chocolate ganache for pure indulgence. Feel free to get creative with combinations!